African Violet Houseplant Easy Care Guide
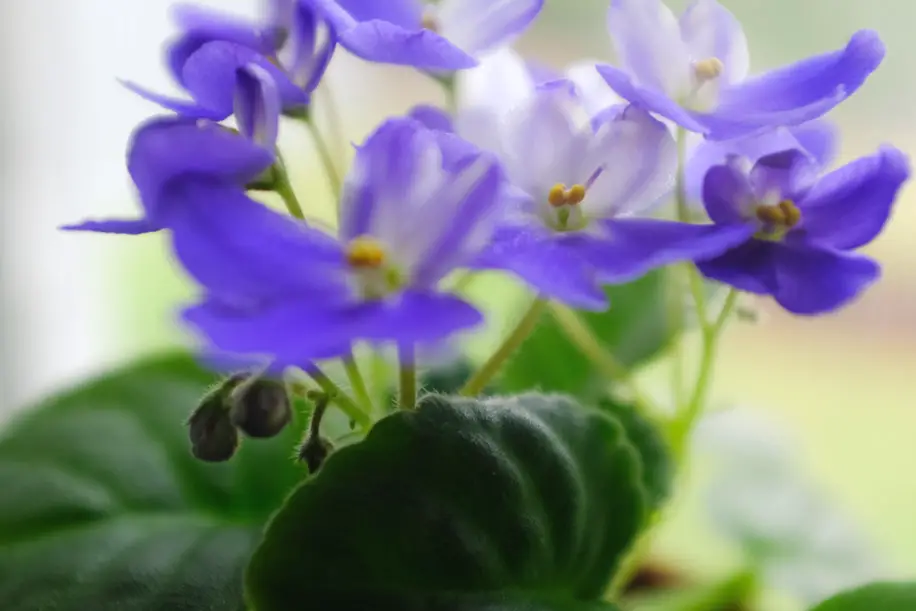
African Violet Houseplant Easy Care Guide The African Violet House Plant may seem a bit intimidating to take care of due to their beauty, however I'm here to share my Easy Care Guide to prove to you they are indeed not that dramatic houseplant some make it out to be! photography by: Simply Living NC For as long as I can remember, an African Violet has been in my life.As a little girl, my Nanna's home was full of them. They were perched upon glass plant filled shelves throughout her kitchen. Now as an adult I have my own glass plant African Violet plant filled shelves! photography by: Simply Living NC There are thousands of varieties of African Violets ranging in colors of white, blue, pink, purple, and reds. Many Violets put off a show by produce two colors throughout their lovely blooms. Their blooms are grown as single and double. Their leaves tend to be fuzzy, although they prefer not to be touched much...or so I have found. These beauties are readily available and even grace the isle of most grocery stores. photography by: Simply Living NC photography by: Simply Living NC AFRICAN VIOLET MY EASY CARE GUIDE: -please note: I am not an expert on Violets, however my simple care guide is what has always worked for me. Purchase your Violet. Look for a Violet with healthy firm leaves and make certain the Violet is free of pests. Look for Gnats flying about the plant when you give is a slight shake or tap of the leaves. Repot your Violet if needed, however do not overpot. I have found my Violets prefer to be a bit tight within their pots. Water: I water when totally dry. I have found my Violets prefer to dry out completely. I water thoroughly until the water drains through. I also make certain they do not sit within their own water. Light: I have my Violets in a North facing window. Yes this is indeed technically incorrect by most Violet care guides, however my Violets have thrived happily within their Northern window for 3 years. Tips: Pinch off old blooms, Rotate Regularly to provide ample sun, Repot as needed, I have found it helpful to take off lower leaves during the repotting process. Make certain the crown of the plant is not covered by dirt. I fertilize every once in a while with ---> This Fertilizer Soil: My Violets once suffered from Fungus Gnats, due to this horrible pest I switched their soil completely. Since switching to the new soil, I not only ridded them of Fungus Gnats, they have produced quite the show with their many repeated blooms. Funny thing is, the soil is a cactus type soil, however Gnats hate it, and my Violets and Pilea's Love it! ---> This is the Soil I Use. Love: Love Your Violets That's "My Simple Lil' African Violet Care Guide"Hopefully your Violets will thrive as much as mine are! IF
Instant Camera Fujifilm Instax DIY Photo Gift
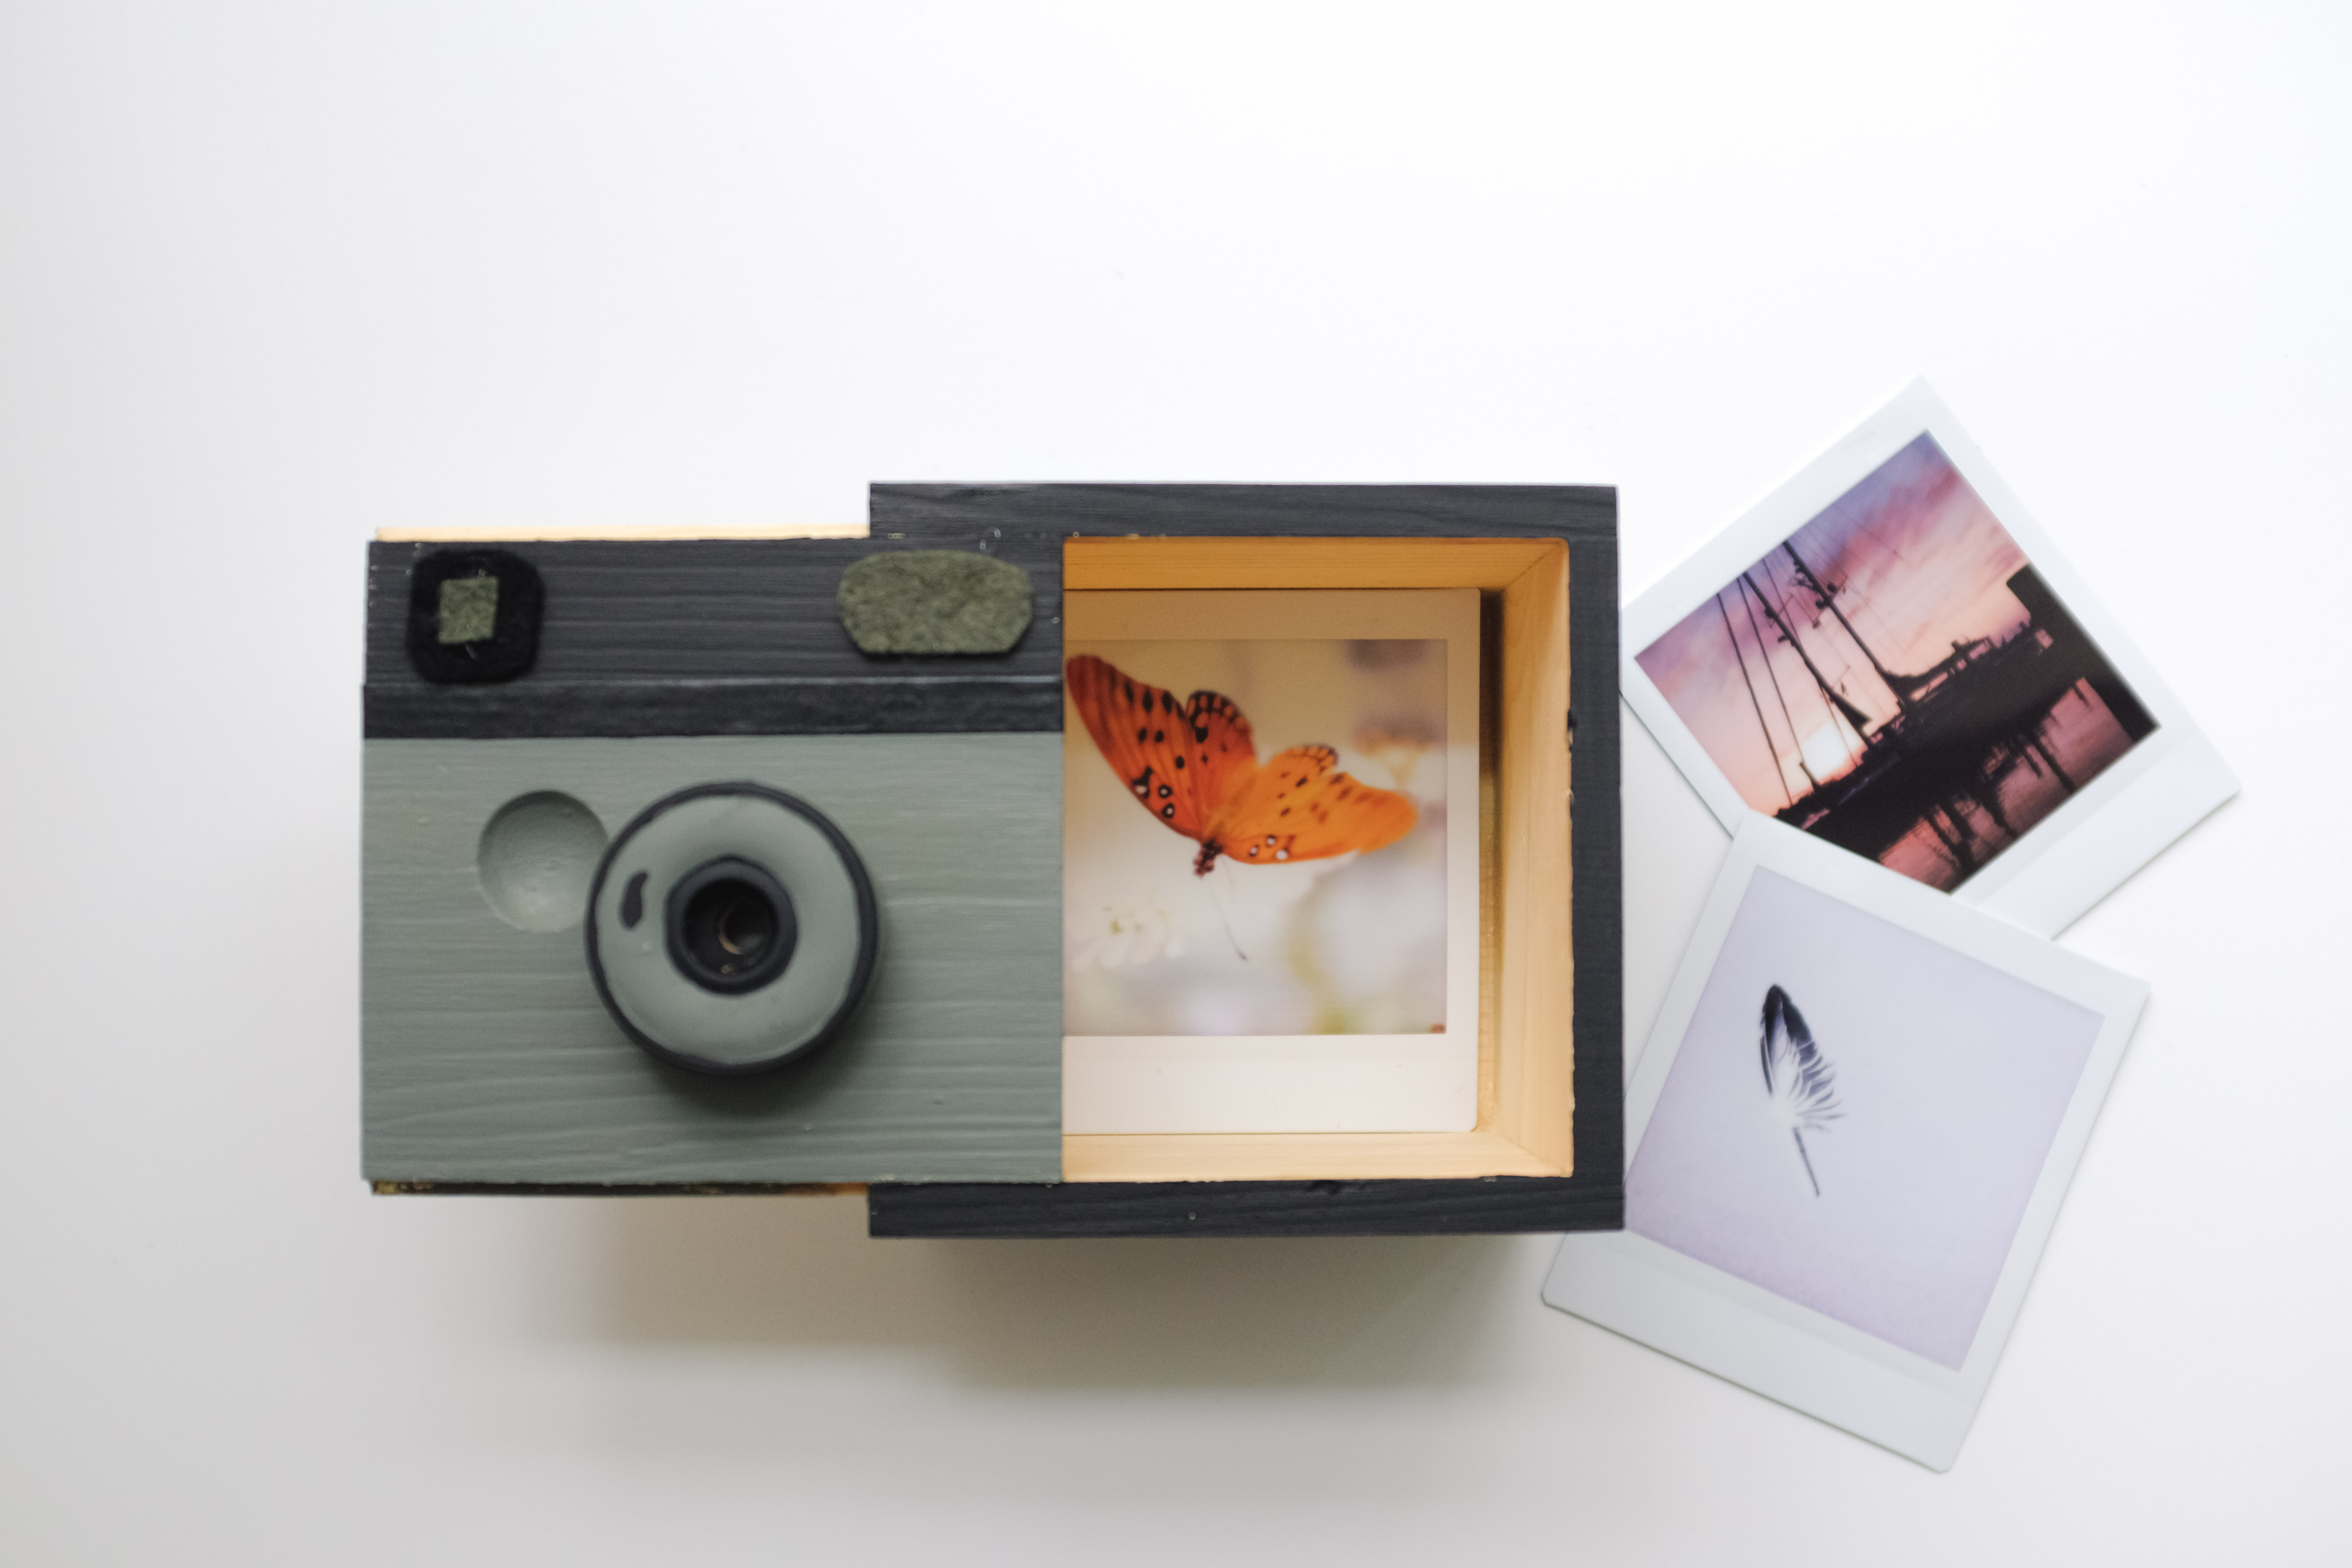
This Instant Camera Fujifilm Instax DIY Photo Gift will be the HIT of all Camera Lovers and Picture Cherishers! Are you searching for that perfect Gift for the camera and photography lover in your life? We have THE diy Gift for YOU! This EASY diy Project is the perfect gift for photographers, mothers, fathers, girlfriends, boyfriends, teens, and friend gifts! Just a Few Simple Inexpensive Supplies and You'll be On your Way to Creating the Gift that will be Cherished for a Lifetime and The Hit of the Party! Follow these Easy Steps to Create this Super Fun lil' Camera Box. DIY PHOTO GIFT SUPPLIES NEEDED: Instant Camera or Instant PrinterSome options would be:Fujifilm Instax SQ6 Camera or Fujifilm Instax SQ10 Camera.Another option which is the option I chose would be to use the Instant Printer Fujifilm Instax SP-3 Mobile Printer alongside your current camera of choice or your smart phone! I adore my Fujifilm X100f, which is why I personally chose the Camera/Printer Option. Make sure to enjoy my Blog Tribute to this amazing sidekick of a camera! Craft SuppliesThis Wooden Unfinished BoxWooden WheelsCraft PaintFeltHot Glue Gun HOW TO MAKE YOUR INSTANT CAMERA PHOTO BOX GIFT: PAINT YOUR BOX a Straw makes for easy painting of lens I USED A PIECE OF WASHI TAPE TO MAKE FOR EASY PAINTING GLUE ON WOODEN WHEEL LENS AND FELT PIECES PRINT YOUR PHOTOS & ENJOY! IF INTERESTED, HERE ARE PRODUCTS MENTIONED IN THE BLOG
Fungus Gnats How to Get Rid of Pilea Houseplant Pests
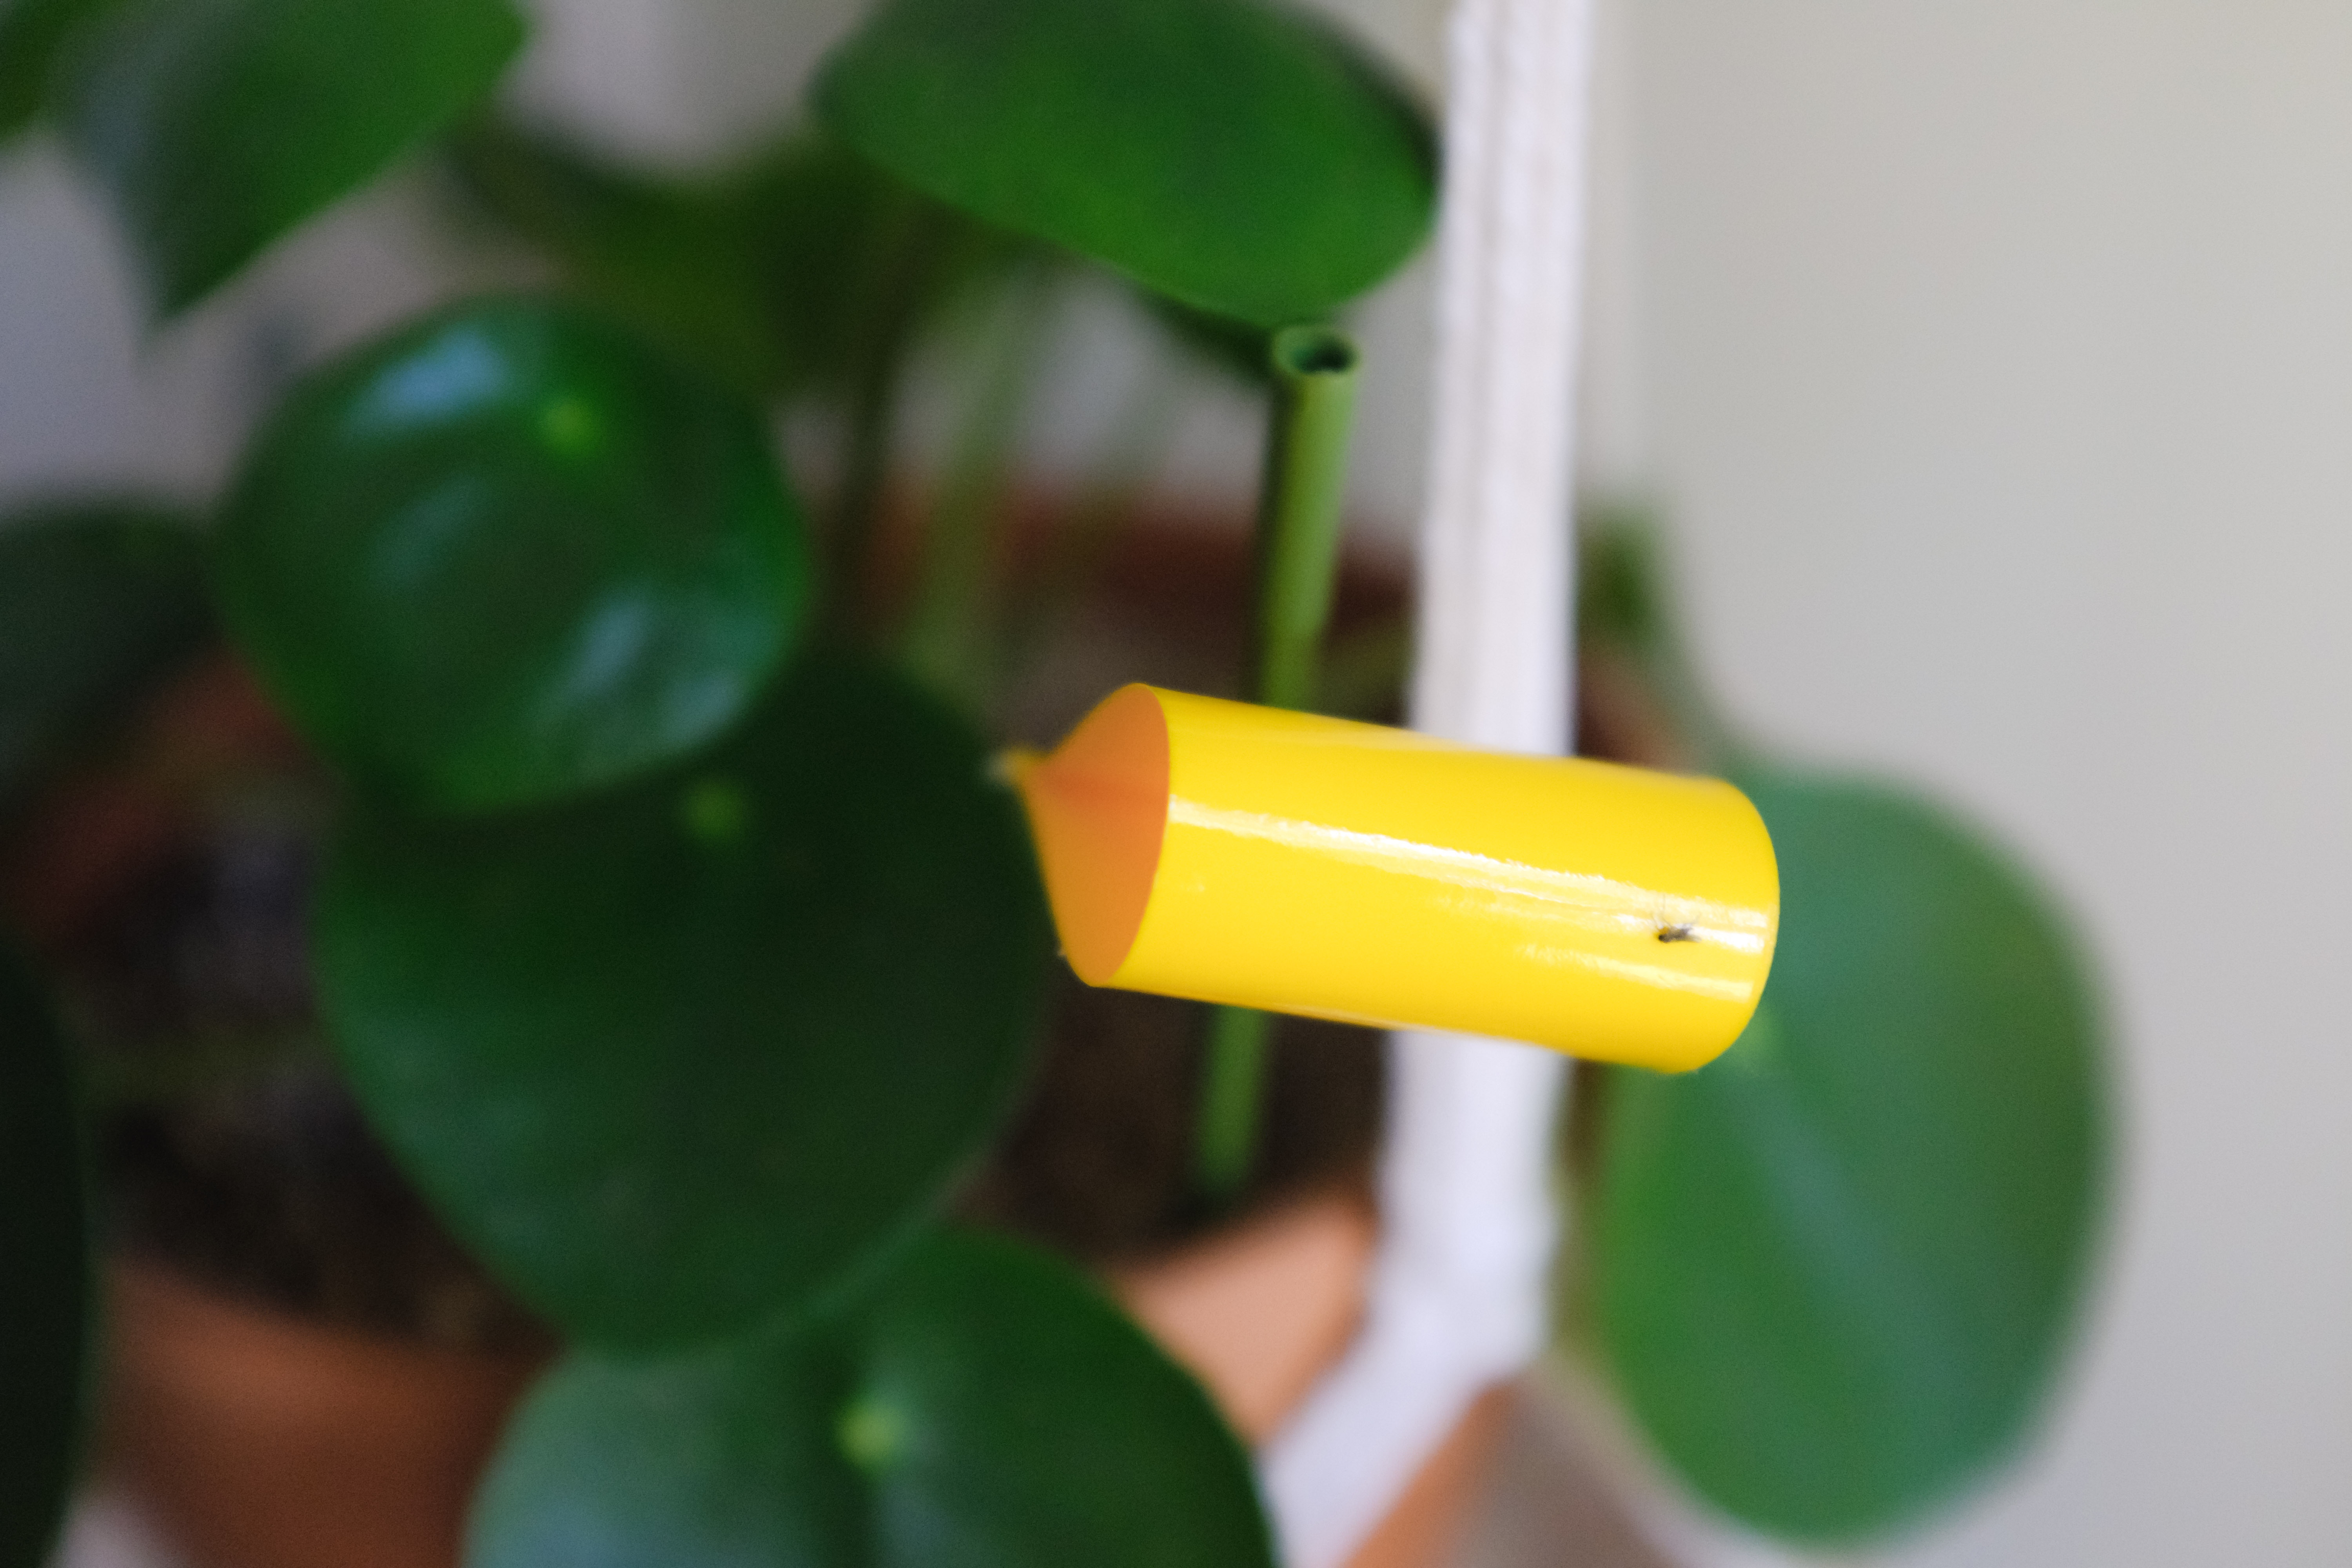
Dreaded Fungus Gnats How to Get Rid of Pilea Houseplant Pests Once and for ALL! I'm here to share my 7 Step SOLUTION with YOU! It's watering day of your beloved Pilea Peperomoides houseplants and other houseplants like African Violets only to find the moment you gently provide your beloved houseplants with a drink of water the horror show begins of the flying miniature evil winged ones. The Dreaded Fungus Gnats, I know that feeling All too Well, UGH! Click the Image to Purchase Yellow Traps on Amazon, I truly never live a day without these sticky guys! YELLOW STICKY TRAPS PURCHASE LINK FAVORITE PILEA AND HOUSEPLANT SOIL PURCHASE LINK. MORE STEP BY STEP TIPS BELOW: WHAT ARE FUNGUS GNATS? The Fungus Gnat (Mycetophilidae and Sciaridaeis) a tiny dark colored fly that infests soil within moist houseplant media, and organic decomposition. I personally feel they resemble a morph between a fruit fly and a mosquito. The Fungus Gnat is very tiny at only about 1/16 to 1/8 inch long with long legs and clear wings. Fungus Gnats Preferred Home is moist potting soil, they can be found flying within green houses, as typically there is plenty of food source and nesting for them. The female Fungus Gnat is a short lived pest, only living about 7-10 days. Within their short-lived life, the female will lay about 300 eggs. Yes, those eggs will typically be laid within your damp houseplant potting SOIL! GROSS!! After the eggs are laid, Fungus Gnat Larvae will appear within 4-5 days. The larvae may feed on plant roots during the next 2-3 weeks. Thereafter and adult Fungus Gnat will emerge. Fungus Gnats will not bite or harm people, however they can be quite the nuisance and may harm your delicate houseplant roots. WHERE DO FUNGAS GNATS COME FROM? Fungus Gnats can come indoors from open windows, doors, drains, and yes they can even fit through screens! Another way to introduce Fungus Gnats to your beloved Pilea Plants and/or Houseplants is purchasing a new plant who's soil is infested! Yuck! Therefore I always recommend growing your own Pilea Babies if possible. If you want to know how I go about propagating my own Pilea Plants please enjoy my Pilea Propagation Blog! Fungus Gnats can be brought indoors when you bring your beloved houseplants back indoors for the cold months. This being said I never EVER put my houseplants or my beloved Pilea Plants outdoors. Last but not least one of the most common ways to introduce the horrid Fungus Gnats to your home is through commercially bagged potting soil mix. That's right friends, that expensive bag of potting soil purchased at your local big box store and may possibly be branded by a "well known" name....well it very well may be a big bag of Fungus Gnats and their Eggs! This is part of my solution to ending my Fungus Gnats for good! Keep on reading to read how I ridded my beloved Pilea Houseplants from
Smith Mountain Lake VA Our NC Hurricane Florence Escape | Things to do include Peaks of Otter
Journey to Smith Mountain Lake VA; enjoy FUN Things to do! There's just something magical and almost mystical about Smith Mountain Lake, tucked away in the Central Virginia within the Blue Ridge Mountains. This hidden gem is short drive from Roanoke, VA and Lynchburg, VA while being just a few hours away from the Washington DC area. For us here in Southport, NC we are just a little over 4hrs to get to enjoy this picture perfect peaceful getaway.
NC 4th of July Festival Southport North Carolina Guide
The quaint town of Southport NC is Home to the NC 4th of July Festival. Enjoy our NC 4th of July Festival Guide through the eyes of a LOCAL in Southport, North Carolina! Festival event calendar, parade route, fireworks schedule, things to do, and important tips to enjoy this fun-filled festival. It's surely one of the best towns to enjoy the Fourth of July and we are here to tell you why! Enjoy our guide as local residents. HISTORY & ABOUT THE FESTIVAL: Southport, NC has been celebrating the 4th of July for over 200 years, with their first celebration taking place all the way back in 1792! "Festival of Free Men" was the name of the celebration that took place from 1792 until later years when it transformed into the festival as we know it today of "NC 4th of July Festival" The festival takes place yearly within the quaint coastal town of Southport, NC attracting over 50,000 people! This is quite the crowd for our small town which is home to under 4,000 residents. Southport NC's Fourth of July Festival is full fun including an old fashion hometown feel parade, a leisurely stroll of the arts & craft show, beach day at our neighboring beach town of Oak Island, NC, freedom filled ceremonies, classic car show, fun for the children, live music, and oh my the goodness of yummy carnival type food fills the air just waiting to fill your tummy! NC 4TH OF JULY FESTIVAL THINGS TO DO: FESTIVAL DATES: July 1st through July 4th, 2018 OUR FAVES AS LOCALS: (these are our personal top picks that we personally enjoy most) ARTS & CRAFTS IN THE PARK: July 2nd through July 4th | 10am - 6pm Location of Franklin Square Park on East West and Howe Streets Oh my goodness, theres' just something about strolling under the grand old Oak Trees admiring all of the local talents as they sell their hand-made works of art. From paintings, jewelry, woodworking, yard art, florals, shell art, plants, goodies for the little ones and so much more! With over 120 vendors, you surely will not be able to leave without taking home an artisan's craft or two....or three! There are also food and drink vendors nearby, just in case all that strolling makes you hungry and thirsty! SOUTHPORT NC 4TH OF JULY PARADE: July 4th | 11am Location is throughout downtown Southport. Starting at the corner of Atlantic and Moore Streets, making it's way from Moore to Howe Street. There after ventures Howe Street North to Fodale Avenue. Turning Right onto Fodale Ave. and ending near the Ocean Trail Healthcare Center. Wanna know what the parade is like? Well, let me tell ya...just think about a parade you may see in the movies, (like the 4th of July movie seen in Nicholas Spark's Safe Haven Movie which was filmed here in our town of Southport NC) you know the good old fashion, home-town, Southern charm type of parade! I
Pilea Peperomioides Propagation How to Care for Chinese Money Plant
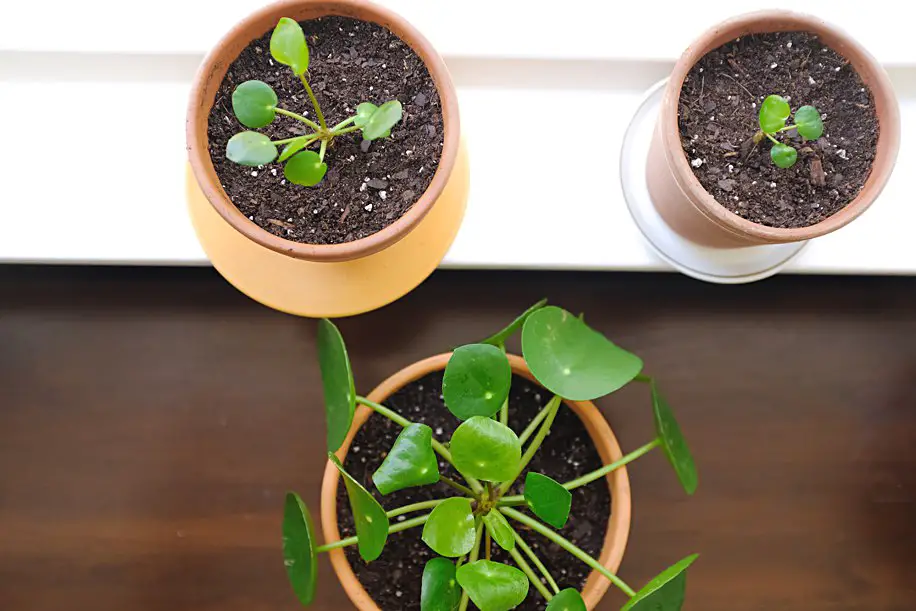
GROWING MORE BEAUTIFUL PILEAS FROM YOUR OWN PLANT THROUGH PILEA PROPAGATION. IT'S SUPER DUPER EASY! Has your Pilea Peperomioides produced baby Pileas? Are you wondering how to go about Pilea Peperomioides Propagation and How to Care for your Chinese Money Plant? You are quite the lucky one to have added this gem of a houseplant to your green family! It's one of the trendiest plants and hash tagging #Pilea on Instagram will provide you with hours of Pileas! The Pilea Peperomioides is quite hard to come by, but once you do get your hands on this beauty your heart will forever be smitten! This Trendy Houseplant is one unique little lady, to read more a bout her you may enjoy my first Blog Series:"Pilea Peperomioides Chinese Money Plant The Trendy Plant" You've been enjoying your Momma Pilea Plant, and one day you notice a teeny tiny little baby popping up through your houseplant soil! Could it be? Could you now possibly have two Pilea Peperomioides? Indeed you do! These little ones are also called Pilea Pups. You're probably asking yourself right about now, "how in the world to do take away my baby Pilea from her Momma?" Well it's actually quite easy and I'm here to help you step by step with Propagation of your Pilea Peperomioides also known as the Chinese Money Plant. Make sure you wait long enough for your little one to survive on her own. Mine are about 2-3" tall. PILEA PROPAGATION SUPPLIES NEEDE: -A Sharp Clean Knife -4" or Smaller Terra Cotta Pots (depending on the size of your baby Pilea) -Or a Glass Rooting Bottle-THIS IS MY FAVORITE PILEA SOIL (I also use it for my other houseplants)-THESE FUNGUS GNAT TRAPS I WILL NEVER NOT HAVE IN MY HOME HOW TO PROPAGATE YOUR PILEA PLANT Dig with your fingers down in the soil as the baby Pilea guides you to her preferred place of cutting.You'll want to try to get as much of her root as you possibly can.Next, simply cut the baby pup away from the mother Pilea. From here you can decide for yourself if you'd like to water root the pup or soil pot the pup.I chose to soil pot by simply planting the Pilea Pup Rooting in Moist Soil.If you choose to water root, you simply place in a small rooting bottle of water. Now it's time to sit back and watch your baby or babies grow big and strong like their Momma!Oh my heart, aren't they the cutest lil' Pileas you ever did see?!?It's been about 4 weeks since I propagated my baby Pilea Pups and they have already started producing new leaves!It's so much fun watching these little ones grow towards the Sun! I hope you enjoy your Pilea Peperomioides as much as I do! Don't forget to keep your Pests under control! I have finally figured out a SOLUTION to those darn pesky Fungus Gnats!7 Simple Steps to Get Rid of Fungus Gnats Life is Indeed
DIY Garden Pom Pom Magnetic Chalkboard Easy Crafts
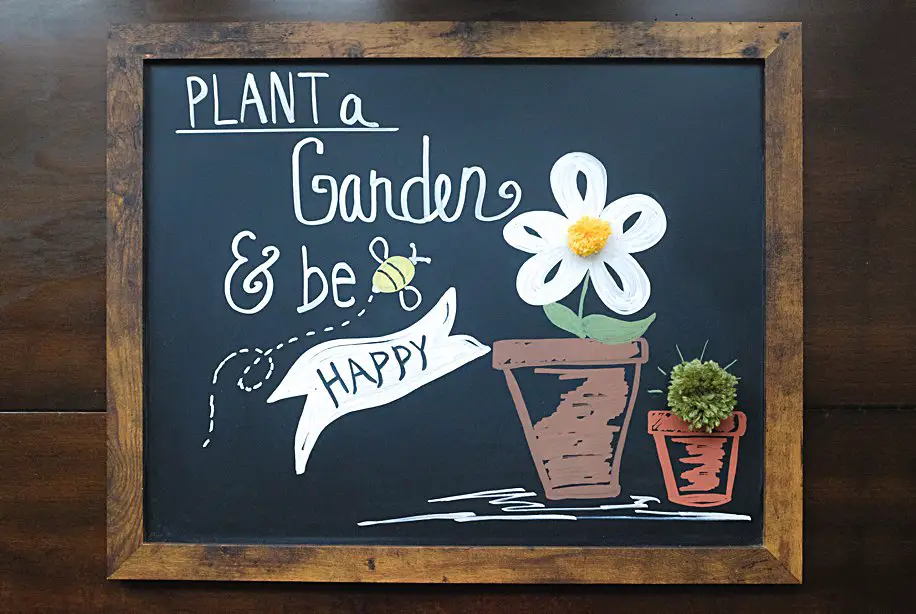
Do you find yourself at peace within your Garden?So much that you want to surround yourself with your love of gardening within your home?I know I sure do! I've combined my love of Gardening and DIY in this fun craft project! DIY Garden Pom Pom Magnetic Chalkboard Easy Crafts SUPPLIES: Magnetic Chalkboard Any type of magnetic chalkboard will work for this fun project, however I've found one that I've fallen in love with!I am so happy I found this Lovely Chalkboard by Lodie Doddie on Amazon. It's not only pretty to hang on the wall, it works perfectly. They also have a smaller size version of this chalkboard. Chalk or Chalk Markers Chalk will work just fine, however I've recently found it so much fun doodling with these Chalk Markers also by Lodie Doddie on Amazon. They write smoothly, are nicely pigmented, and they erase well! Another bonus is they don't leave any residue or hallowing behind. Pom Poms Your pom poms can be purchased like these.ORSimply make your own with these little bundles of Yarn and learn how on my "How to Make Pom Poms Blog" Magnetic Sticky Tape To create your magnetic pom poms, you will need to apply sticky magnetics to each. Hook and Jute Hanging Bag I fell in love with this cute little hanging bag, perfect for storing my pom poms when not in use.You'll also need a magnetic hook like this one. DIRECTIONS: Directions are easy peasy, simply create a pom pom magnetic garden by doodling whatever plant, flower or garden your heart desires! Want more fun magnetic chalkboard projects? Enjoy my 4 Seasons Pom Pom ChalkBoard Project!Have fun and let your imagination flow...and simply be HAPPY! I hope you've enjoyed my inspiration of a Pom Pom Magnetic Garden, I'd love to hear all about it in a comment below!I'm sure many of you artists out there will have your very own art pieces to share...I'd love to see them! IF INTERESTED, HERE ARE THE PRODUCTS MENTIONED IN THE BLOG
DIY 4 Seasons Pom Pom Magnetic Chalkboard Crafts for Kids & Adults
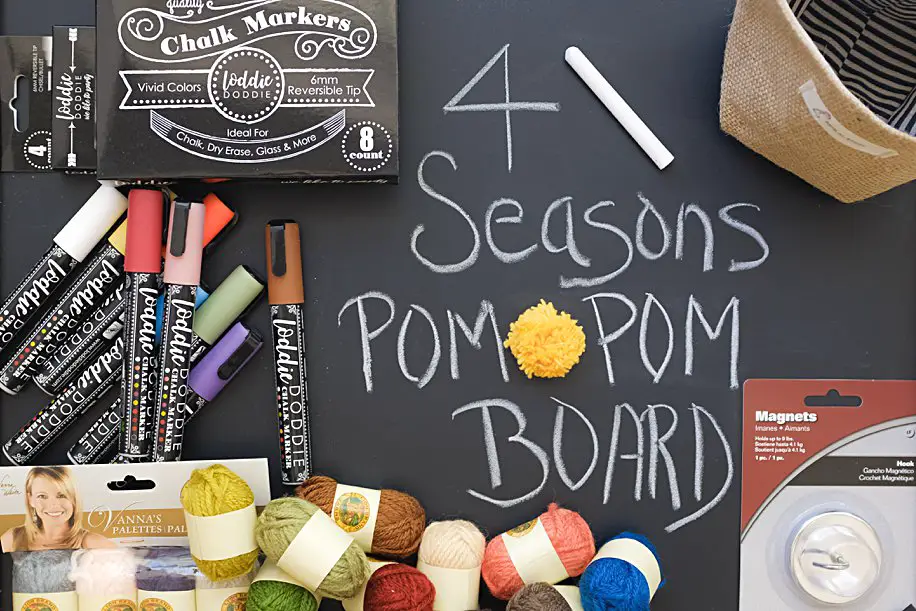
Do you love decorating your home throughout the Seasons?Do you love Pom Poms, Doodling, and love the Simplicity of Chalkboards?I know I sure do! I can't wait to share this heart-touching whimsical craft with you! DIY 4 Seasons Pom Pom Magnetic Chalkboard Crafts for Kids & Adults! Chalkboards were once only used within the schools, now they fill our homes with fun, whimsy, and memories of cherished days of childhood! They are no longer used just for practicing handwriting or adding 2 + 2; chalkboards are now an artistic creations that hang upon our walls! Enjoy this fun chalkboard craft that forever changes throughout each Season! SUPPLIES NEEDED: -Magnetic Chalkboard I searched high and low for the perfect magnetic chalkboard and finally found THIS ONE by Lodie Doddie on Amazon.It's simply beautiful! Magnets stick, chalk smoothly glides and it erases with ease. A truly lovely product.I purchased the large 18"x22" which seems the perfect wall size, however they also make a smaller 11"x14" size. -Chalk or Chalk Markers This diy craft project can be enjoyed using traditional chalk found at any local store.(OR)If you are like me you will enjoy these LOVELY CHALK MARKERS also made by Lodie Doddie!Oh my goodness, how did I ever enjoy a chalkboard without these markers?They are absolutely wonderful. They glide on smoothly, are highly pigmented, and the best thing is they erase with ease!Another bonus is they do not leave any type of hallow effect that other markers may leave. -Pom Poms You may purchase pom poms like THESE POM POMS.(OR)Simply make your own magnetic pom poms!I adore making pom poms, you can learn how I make them at my HOW TO MAKE POM POMS BLOG.They are easy peasy to make, I like using these CUTE LITTLE BUNDLES OF YARN to create my pom poms. -OPTIONAL ROLL OF STICK ON MAGNETS If you are creating your own pom poms, you will a roll of sticky magnetic tape. -OPTIONAL BAG I purchased this SUPER CUTE BAG to hold my pom poms when not in use.(I removed the little stitched label) -OPTIONAL MAGNETIC HOOK An easy way to hang your pom pom filled bag upon your magnetic chalkboard is with a MGNETIC HOOK. -DIRECTIONS: Use your imagination to create your works of art for each Season! SAY HELLO TO SPRING TIMEBunnies, Pastel Flowers and More. WELCOME SUMMER TIMEOh the Simplicity of Daisies in the Sweet Sunshine of Summer! HAPPY FALLTurkeys, Fall Leaves, and being Thankful and Grateful! A WINTER WONDERLANDSnow Covered Trees, Holly Leaves, and Cheer of Red and Green! I hope you enjoyed my inspiration for this fun 4 Season Pom Pom Magnetic Chalkboard!If you give it a try, I'd love to hear all about it in a comment below! I'm sure many of your artists out there will come up with beautiful designs!
DIY How to Make Pom Poms for Pom Pom Crafts
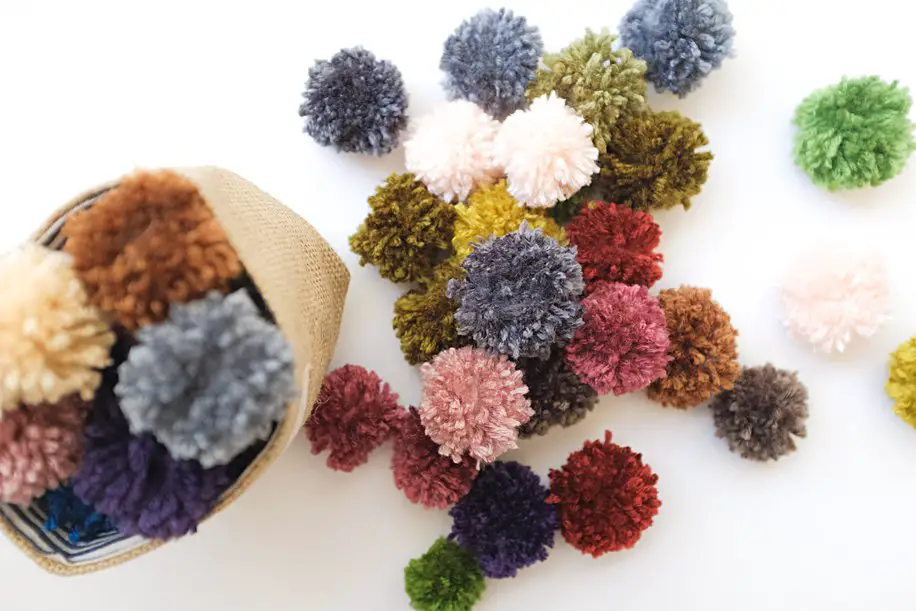
There's just something simply adorable about Pom Poms and Pom Pom Crafts! Why purchase pom poms when you can DIY and learn how to Make Pom Poms at Home! Pom Poms are super easy to make and only need three supplies of which you most likely already have within your crafty filled home. Yarn, Scissors, and a Fork, is all you need folks! That's right, a fork! Before I continue you on with my instructional venture of turning a simple string of yarn into a fluffy pom pom, I must ask... Do you also think to yourself why we find a ball of fluff cute? Is it because of the way they feel? That fluffy, squishy texture. Or possibly it is because you can take this cute lil' pom pom and turn it into something totally CRAFTY beyond the pom. I do believe it's all of the above, our hearts just simply adore the little ball of yarn we call the "pom pom" Now, let's get started! POM POM SUPPLIES: -a Fork (any fork will work) -Scissors -Yarn (many prefer wool, however I find most any type of yarn will work) My favorite types of yarn are these SUPER CUTE little Lion Brand Bundles of Yarn I purchased just for my pom poms! They are offered in a variety of colors and are super affordable to. I loved how I could have an array of colors without having to purchase full size skeins of yarn. I mean look at these cute little minis that fit within the palm of your hand! STEP ONE: Wrap the yarn around your fork. The number of times you wrap will determine the size of your pom pom. 20, 50, or 100, you decide how big or how tiny you'd like your little pom to be. After making a couple you'll figure out your favorite size. STEP TWO: Using a smaller piece of yarn, tie off your pom pom. I like to tie mine on each side to make sure it's super tight to prevent the yarn from falling apart. STEP THREE: Cut through your loops. You'll end up with a funny looking bundle of yarn. STEP FOUR: Shape your pom pom. Don't be afraid to give your pom a very short hair cut. ...and there you have yourself a cute little Pom Pom! STEP FIVE: Well, step five is simple...it's time to have some Pom Pom Fun. Go create some cute crafts like my 4 Seasons Pom Pom Magnetic Chalkboard or my Pom Pom Garden Magnetic Chalkboard! The things you can create with pom poms are endless!

