
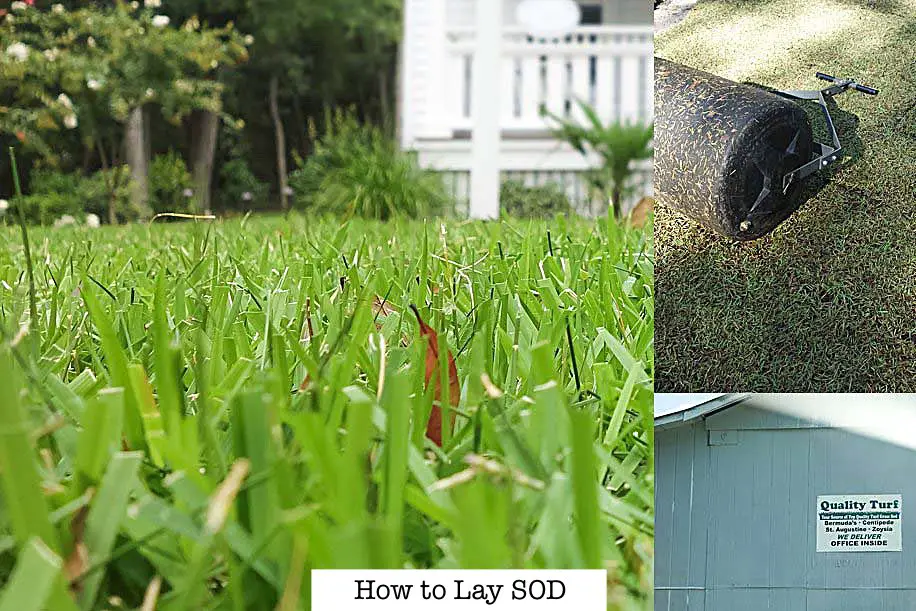
Learn How to Lay Sod to Save Money with our DIY 5 step guide!
Do you dream of a lush thick green carpet of grass beneath your bare feet? Do you have big dreams of running, playing, and creating a cozy green space for you and your family?
Big dreams typically come alongside a big cost and having sod laid by a professional is quite the expensive dream of green.
How to Lay Sod to Save Money
What if we told you by laying sod yourself you can save 50 to 75% of the cost of hiring a professional?
You are probably thinking laying sod is quite the impossible, however we are here to tell you it is indeed quite the possible task!
WHAT IS SOD?
Sod is grass that has been planted, grown, and either rolled or cut in squares. (we prefer squares, as they are easier to handle)
Roots intertwined within the dirt holds the grass sod together as it is cut and presented for sale.
TYPES OF SOD
Sod comes in several varieties. There are different shades of green and different width of blades.
Some sod types you will find are Bermuda grass, Centipede grass, Fescue grass, Kentucky Blue grass, Rye grass, St. Augustine, and Zoysia grass (our favorite)
To determine the best type of grass for your home will be by including the following questions:
Is your yard sunny or shady? What zone do you live in? What type of activities will take place within your yard?
SOD VS SEED:
Sure it seems seed may be the cheap & easy way to get a lawn, however we have found there are more cons than pros in a seeded lawn.
SOD PROS:
-You will have an instant lawn, vs waiting for seed to grow
-Sod is quicker to root than seed
-There are less weeds with a sod lawn vs a seeded lawn
-Sod doesn’t need to be watered as much as seed
-Immediately helps with erosion control, seed has a tendency to wash away
-You’ll be able to walk on Sod, which is opposite to seed
SOD CONS:
-Sod is more expensive than seed
-If some sod sections don’t take root they may need to be replaced
-Sod takes more physical effort to install vs seed
SEED PROS:
-Seed is less expensive than sod
-Seed is easier to install vs sod
-Typically seed will provide you with more choices in varieties
SEED CONS:
-It takes a longer period for seed to grow vs sod
-Some of your seed may not germinate
-Seed is eaten by birds and rodents
-Quite frequently seed produces more weeds
-You will need to water more with seed vs sod
-During rain and storms seed may be washed away
VISITING SOD FARMS:
One of our best tips of advice is to visit a sod farm or two!
Sod farms are the best way to learn what type of sod may be best for your yard.
By visiting sod farms you will also be able to see the grass in person, see it’s true color, and give it a bare feet test of approval!
Visiting sod farms can be quite fun, so enjoy your journey of green.


TOOLS & SUPPLIES:
Once you have determined your choice of sod, it’s time to gather your tools and supplies.
–Long Length Tape Measure
–Heavy Duty Gardening Gloves
–Grading Rake
–Machete Yard Saw
–Garden Hoses
–Sprinklers
–Small Walk Behind Roller (can be rented)
-Old Clothing or Bib Overalls
–Garden Shoes
DIY 5 step guide
STEP 1 / MEASURING:
Measuring will determine the amount of sod you will need.
Typical measurement includes Length x Width = square foot of sod needed
Order your sod from your chosen sod farm. Start step two as you wait for delivery.
STEP 2 / SOIL PREP:
Prepping your soil is as important as step one.
To prep your soil you will want to grade away the soil from your home.
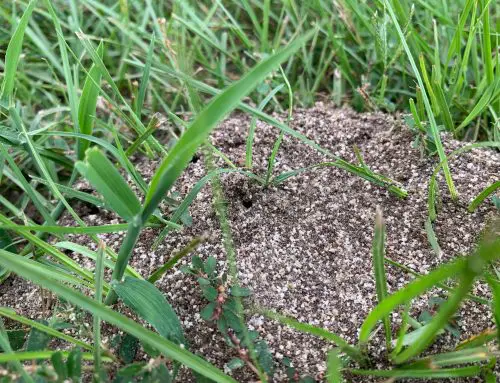
Remove any stones and/or weeds you may uncover during your raking/grading.
STEP 3 / INSTALLING SOD:
24 Hours prior to the delivery of your sod you will want to water the soil.
Watering the soil keeps the roots cool when laying. As soon as your sod is delivered you will want to start laying your sod immediately.
A helpful tip is to ask the deliver to place your sod within the shade, this helps to keep it from drying out.
Each roll or square depending on which cut you have chosen is laid one at a time end to end. Each seam should be kept tightly to one another without overlapping.
Avoid gaps and try to stagger the seams much like when laying bricks. Cut grass with your machete as need to avoid overlapping pre-existing beds and landscaping.
Take breaks as need, stretch your back, and make sure to stay hydrated.


STEP 4 / ROLLING SOD:
We recommend rolling your sod with a roller in which can typically be rented at your nearby lawn and garden store.
This ensures the roots are firmly pressed to the existing soil and helps to prevent air pockets.
STEP 5 / WATER:
Water, water….water!
You will want to water your sod within 30minutes after installation.
Thereafter you will need to water daily or as needed to keep roots moist, unless it rains.
Watering ensures life to your sod. Once rooted watering amount can be cut back.
Last but not least, enjoy the grass beneath your feet!

Have you laid your own sod? We would love to hear all about your experiences!
Any questions, we will try our best to answer your comment below!
Thank you for enjoying my Blog!
I sure do appreciate it and would love to hear from you in the comments!
Peace, Love, and Simple Living Friends!
~Erin


Leave A Comment