
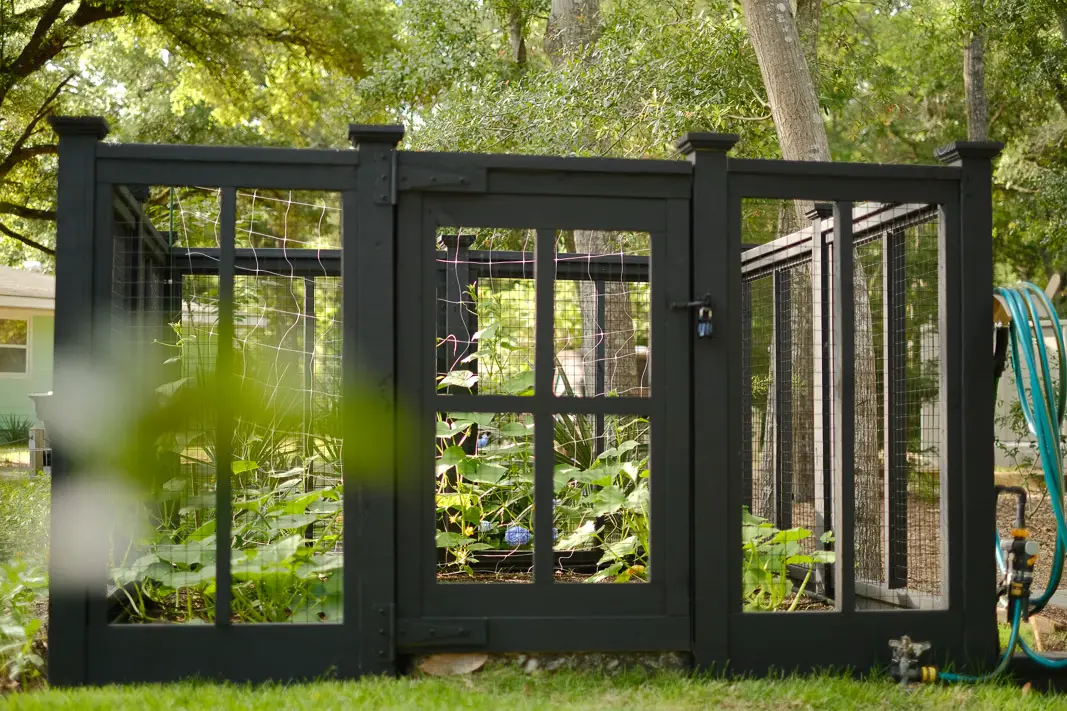
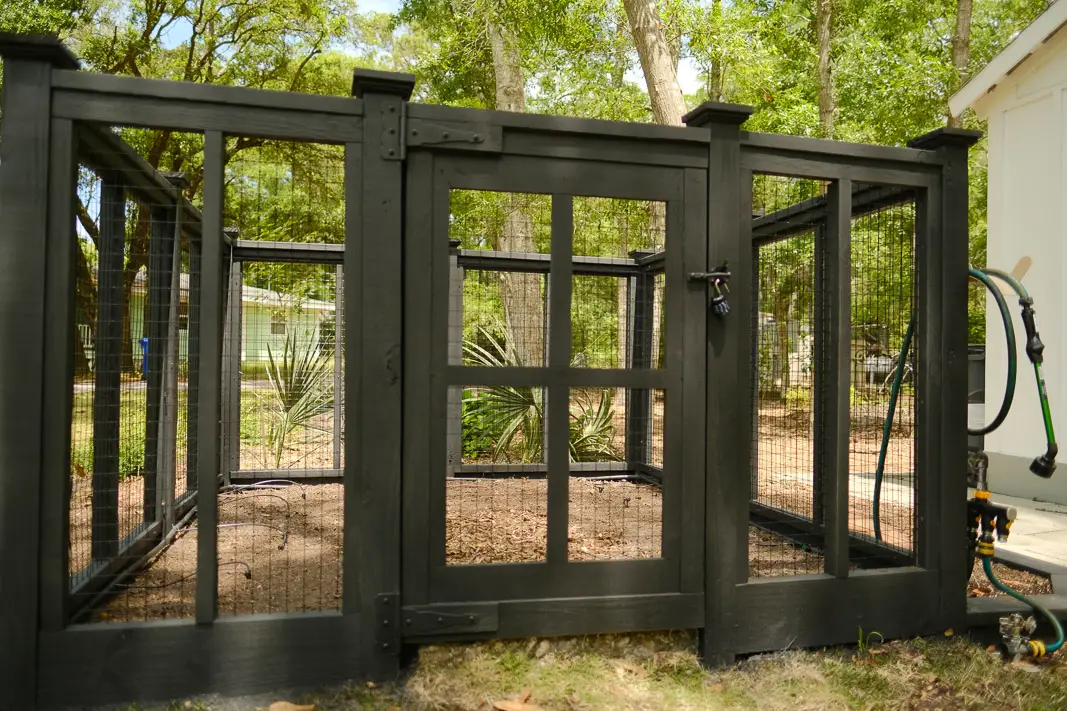
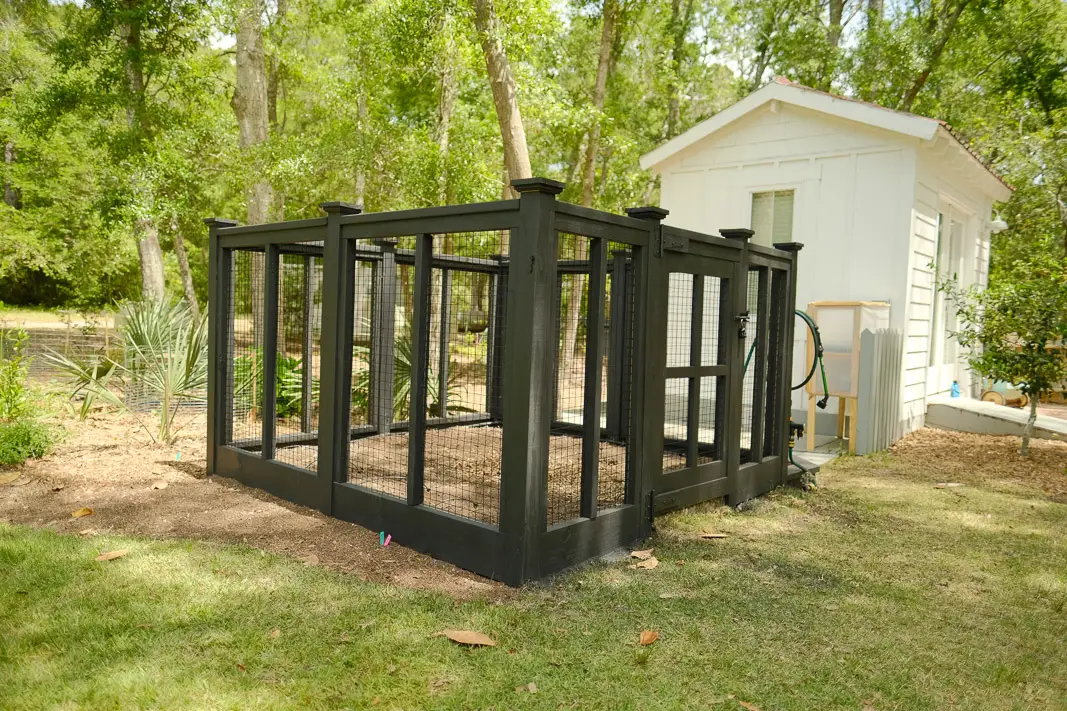
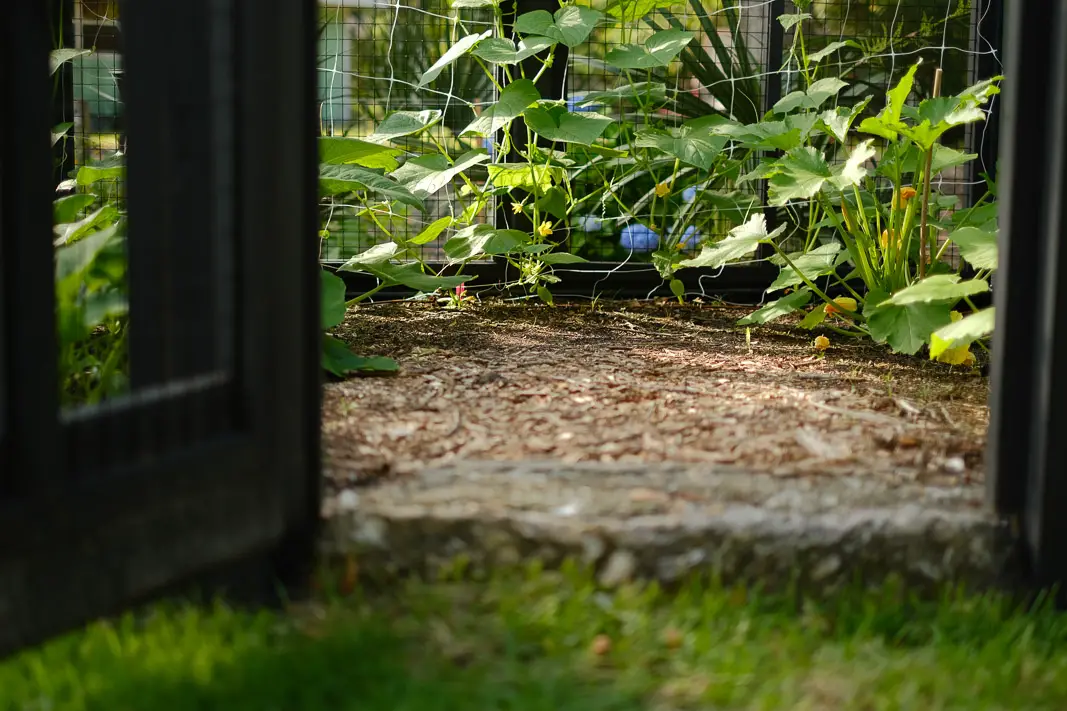
Let’s talk about your DIY Custom Vegetable Garden Fence with our Black Cottage Design!
Are you tired of deer and other animals getting into your garden and eating all off your veggies, yet you don’t really care to put the drab deer fencing bought at the big box store? I’m here to help!
I’m super excited to share our custom design with you!
Adding a DIY Custom Vegetable Garden Fence to your home or cottage will provide you with a one of a kind custom feel with an elegant visual to flow within any landscape or homeowners yard.
How to build this DIY Custom Vegetable Garden Fence; black cottage design
SUPPLIES NEEDED:
(we were able to order all supplies online & have them delivered to our front door!)
-2″x4″x8′ pressure treated lumber
-2″x8″x8′ pressure treated lumber
-4″x4″x8′ pressure treated lumber
-2″x2″x8″ pressure treated lumber for decorative divider in each panel
Black PVC Coated Welded Wire Mesh Size 1.5 in. x 1.5 in.
-1″x2″x8′ pressure treated trim boards for gate
-High Quality Exterior Solid Stain
TOOLS NEEDED:
-Table Saw (we like this Delta Table Saw)
-Miter Saw (we like this Kobalt Saw)
-Sander (we like this Porter-Cable Sander)
-Screw Gun (we like this Ryobi Driver)
GREAT, LET’S GET STARTED ON YOUR DIY CUSTOM Vegetable Garden with our elegant black COTTAGE DESIGN!
-PREP
Prep will vary per person. With us personally, we are very limited with sunny areas in our landscape as we have so many beautiful Oak trees which we love living here in the South. Sadly, Hurricane Florence came through and wrecked havoc on some of them which caused some to die. That being said, this was one time when calling the tree removal service wasn’t as bad as previous times. This tree removals meant we would be blessed with a sunny spot to build our new garden! The large trees were removed, the ground was raked and a pretty stump was left which we have decided to incorporate into an herb garden….more on that to come! Onward bound to designing this beautiful DIY Custom Vegetable Garden Fence with a black cottage design!
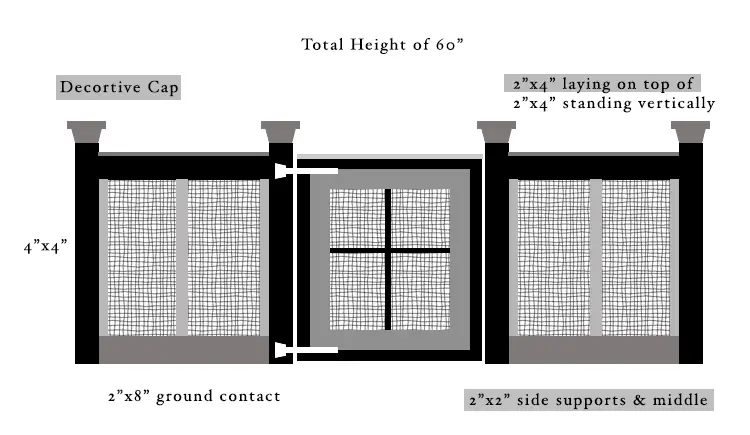
-DESIGN
We designed a template to refer to during the project.
In addition we have kindly included this template of our design to guide you through your project.
Our vision was to be: Elegant, Cottage, Craftsman Style with a Black Finish!
-ASSEMBLY
Setting posts:
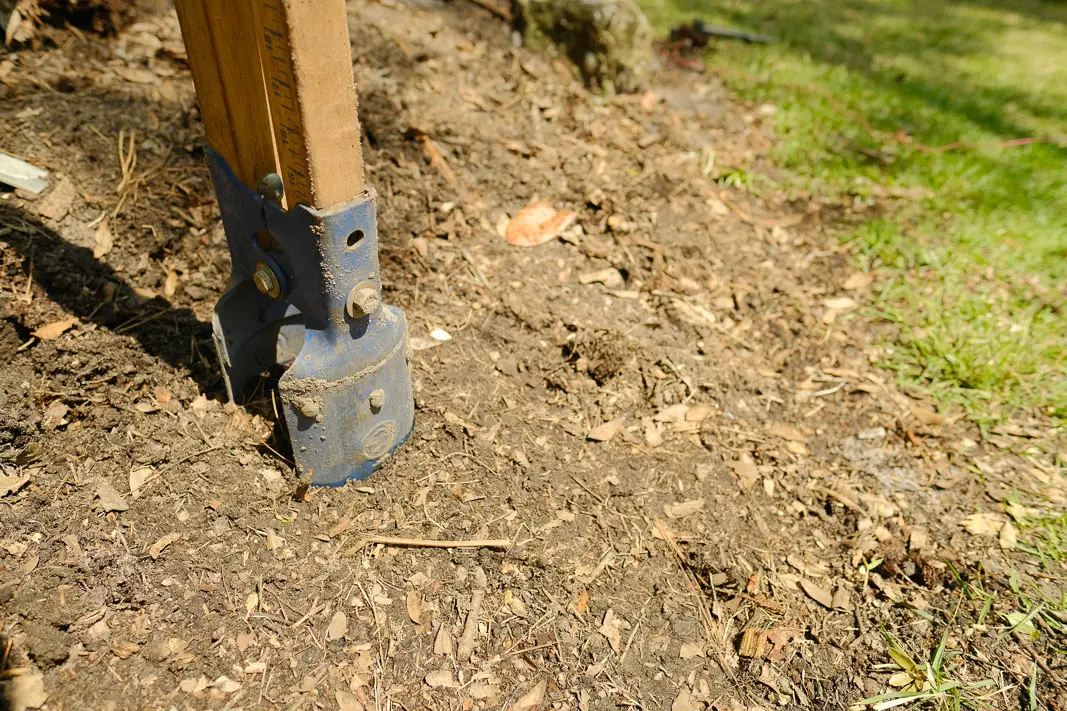
This project started just like building a fence with the posts. We first laid out our location with strings to make sure our post would go in to be square as well to make the correct size that we desired. Once we had our layout we proceeded to digging post holes for 4″x4″ ground contact treated posts. We set our posts “dry” meaning we didn’t use concrete, you could use concrete we just knew it would be strong enough in our ground once everything was tied together.
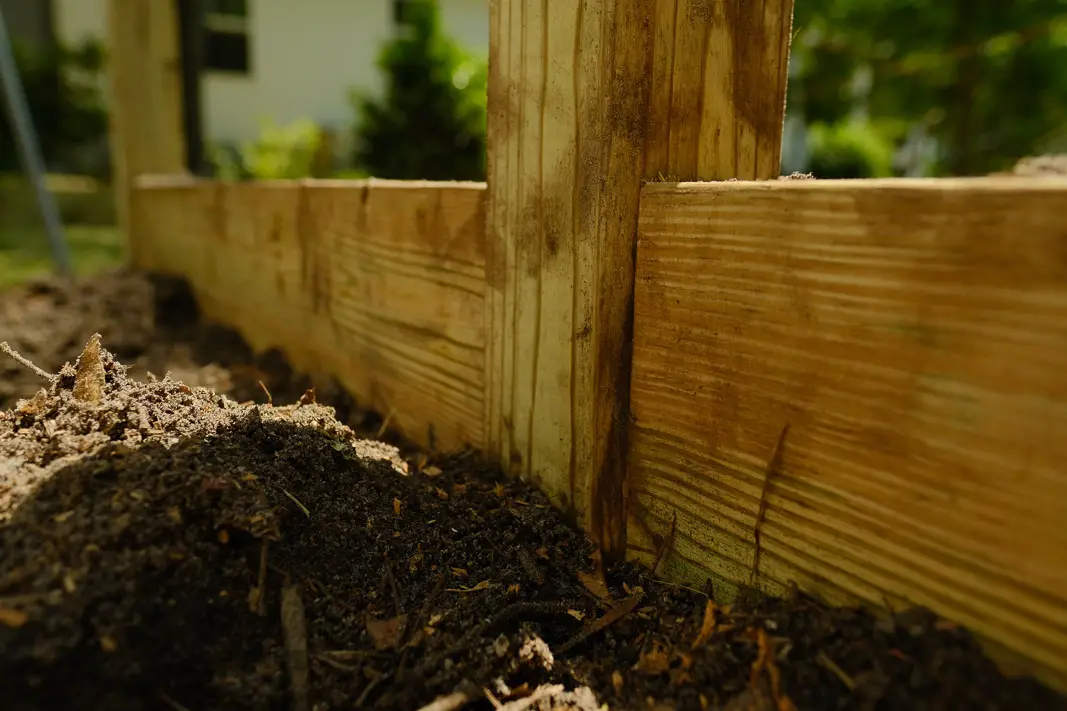
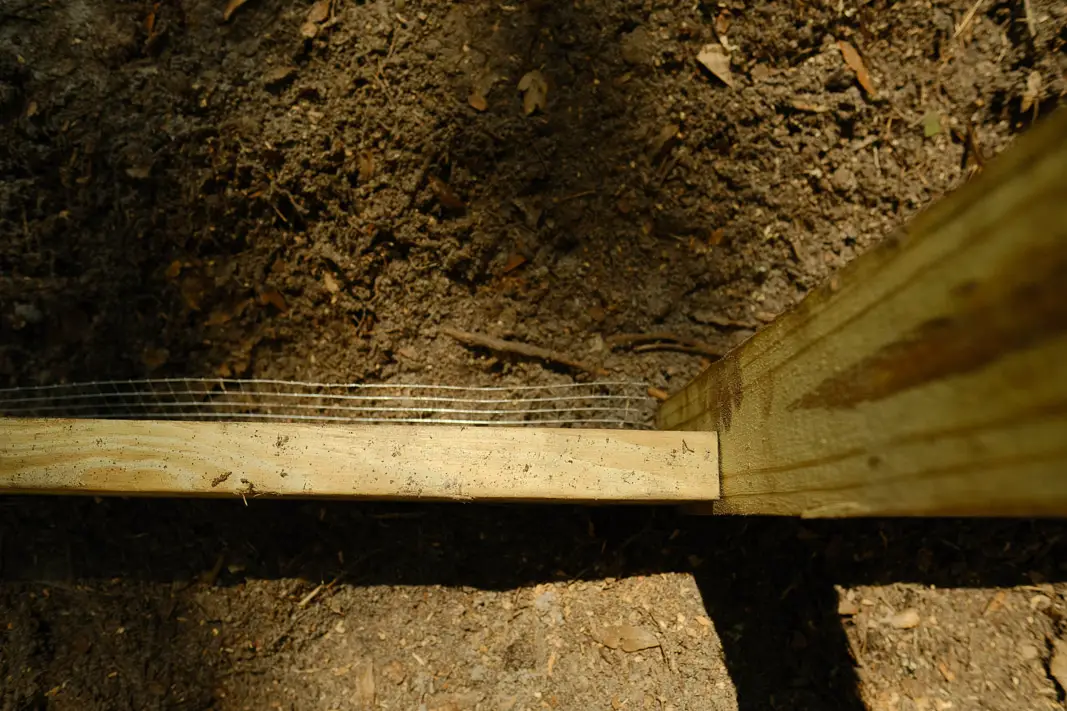
Ground protection:
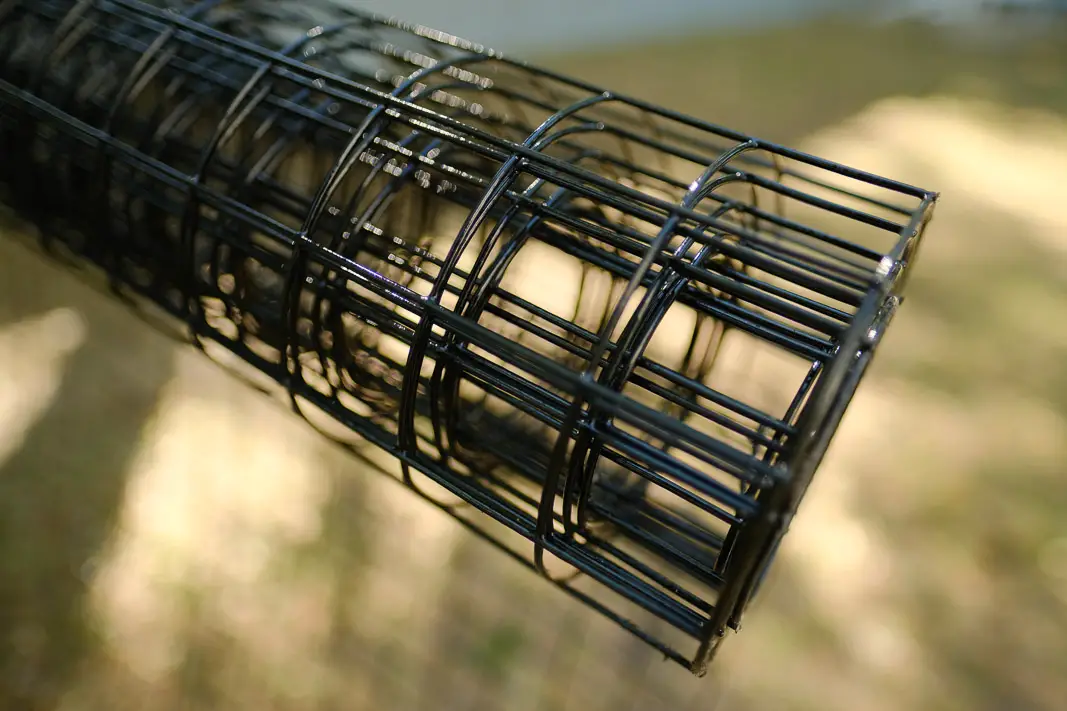
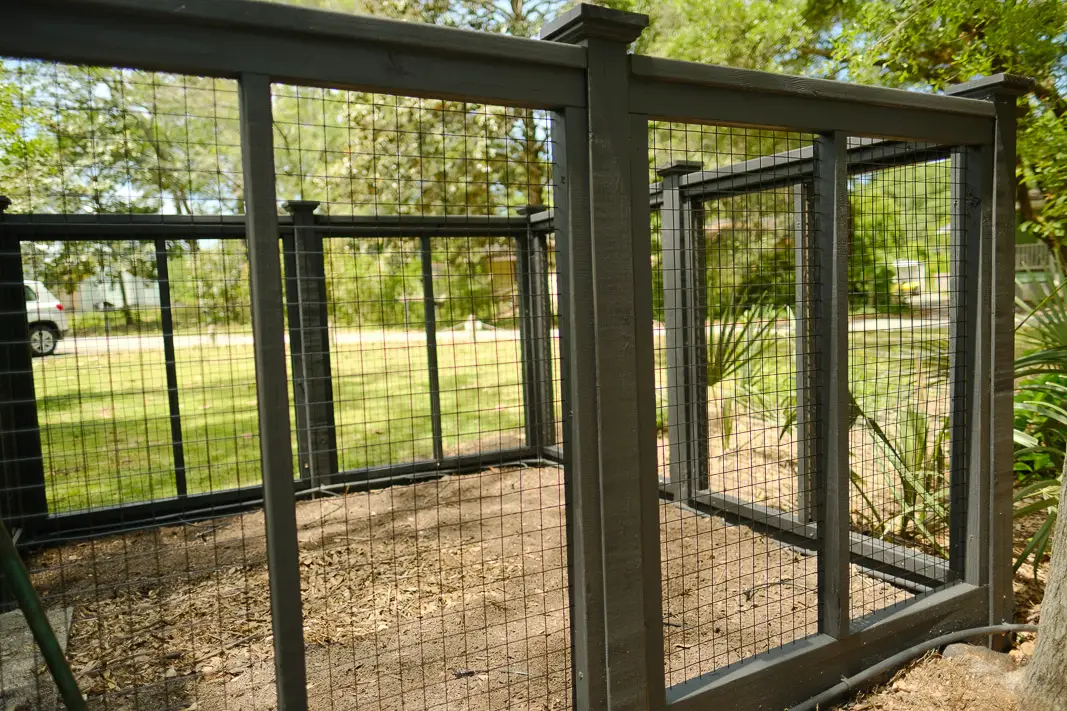
Strarting at ground level we wanted to protect our garden from moles, voles, and rabbits from being able to dig under. To achieve this we used this heavy hardwire cloth that goes up the 2″x8″ ground contact treated lumber which we used these pocket screws to attach to the 4″x4″, then is bent 90 degrees to lay on the ground. Once everything is done we came back with mulch or topsoil to cove this hardwire cloth.
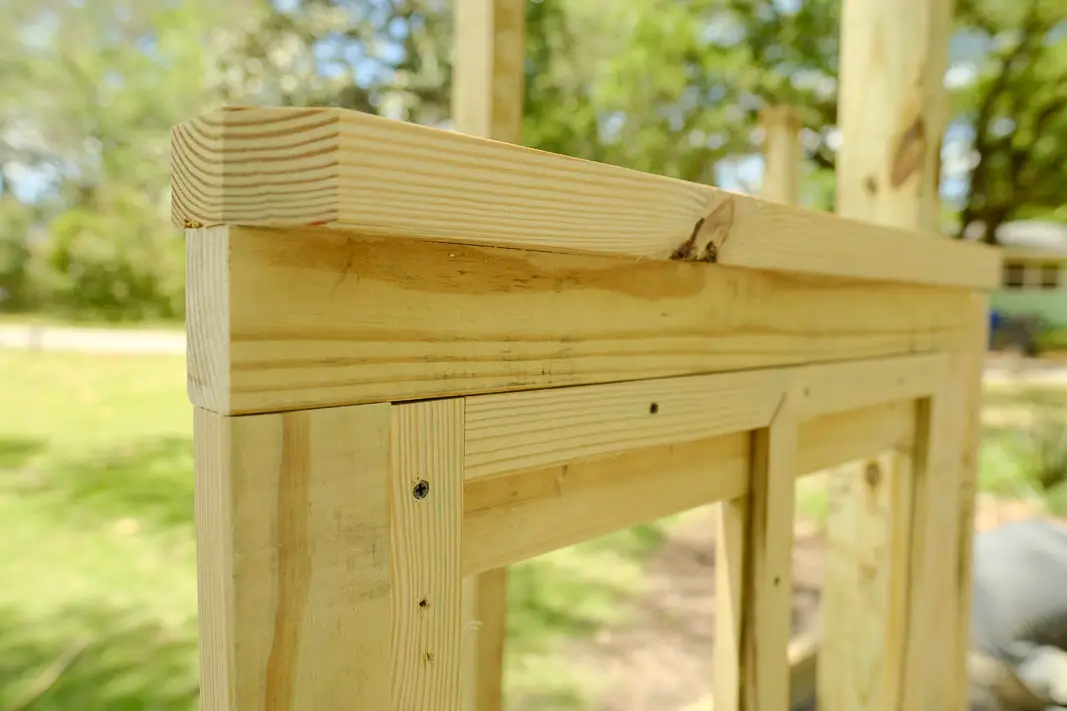
Top rail:
For the top rail we just kept it simple with placing a vertical 2″x4″ then toping that with a horizontal 2″x4″, then to complete it we made our own top decorative caps, but you could also just buy them.

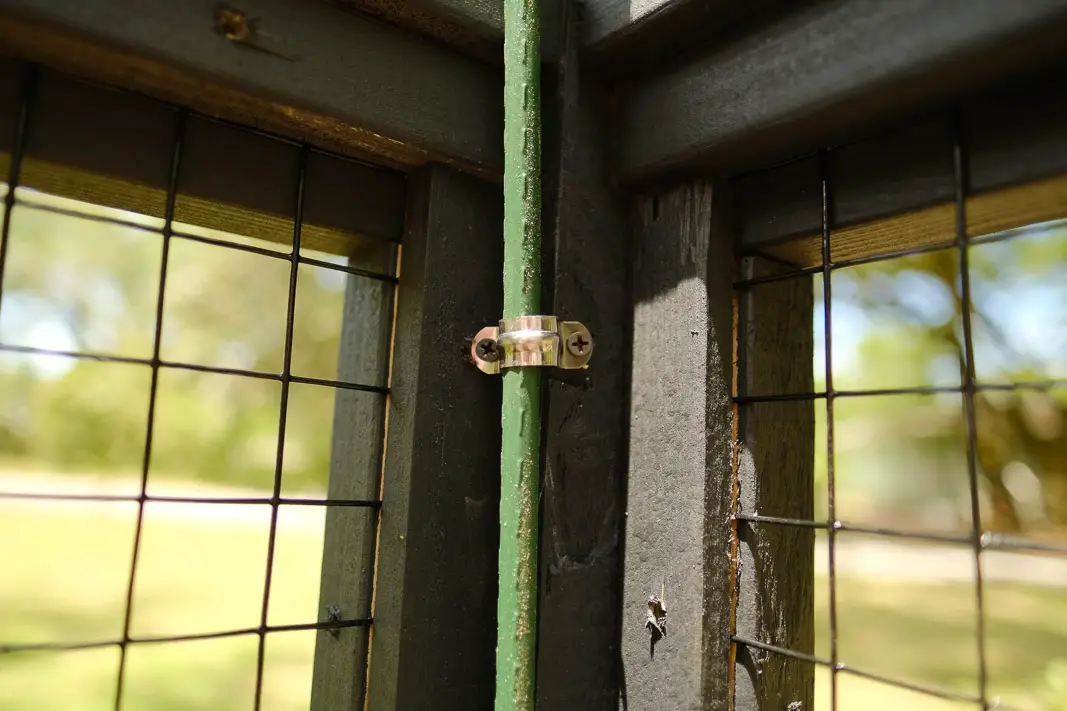
vertical rails:
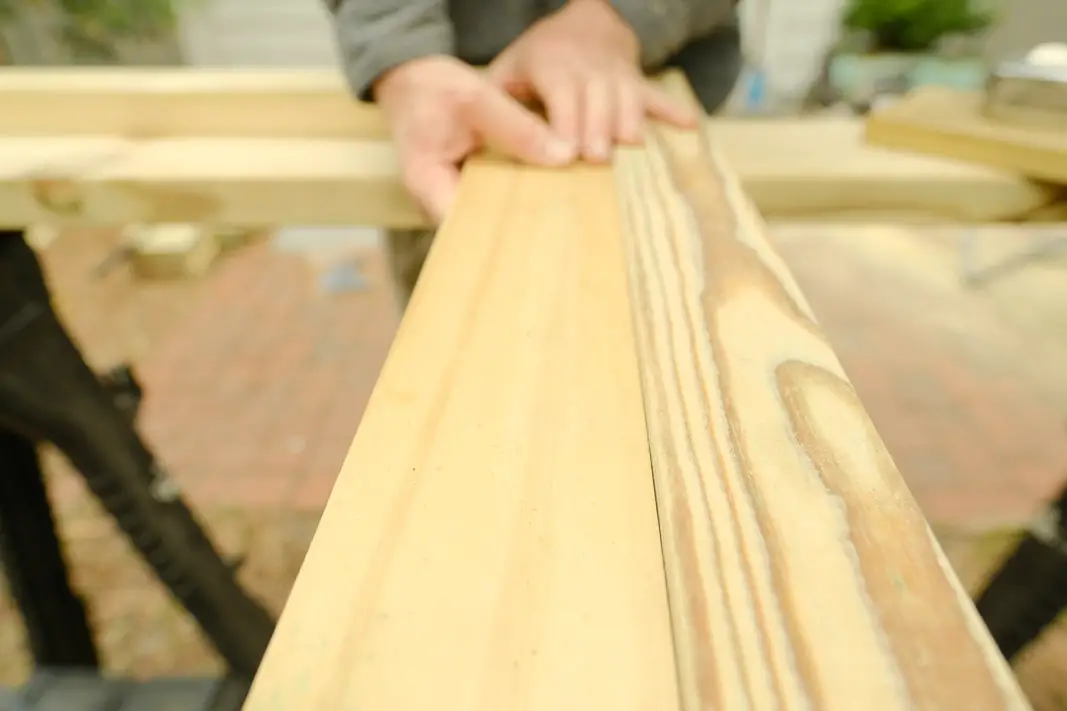
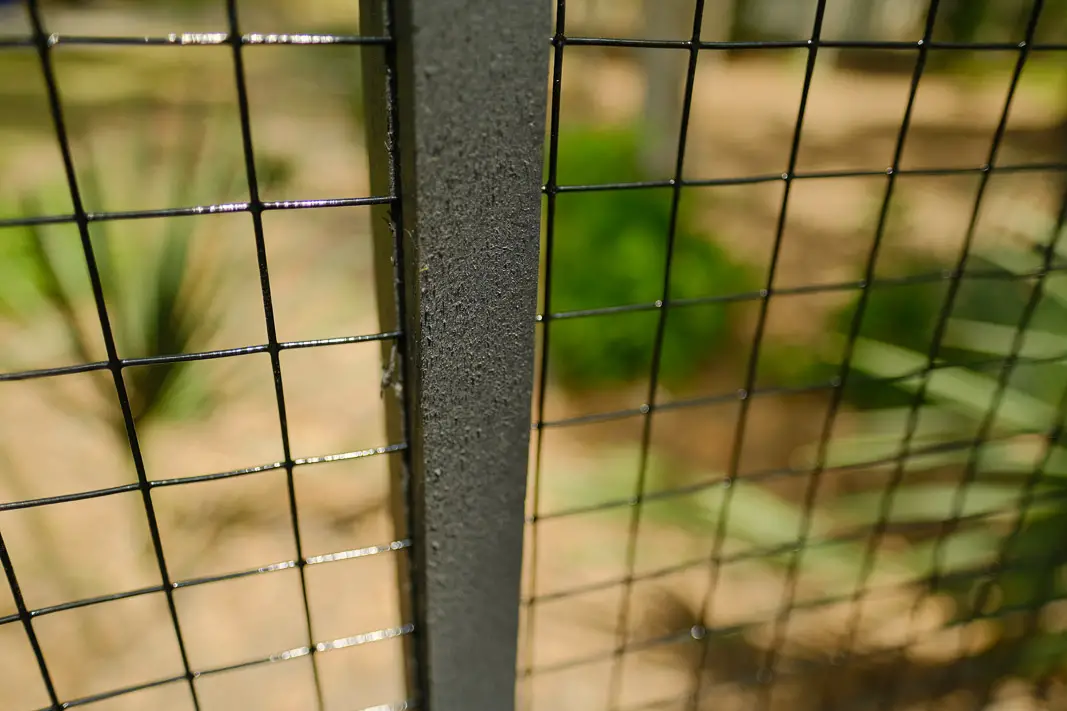
Now is the time to install the vertical rails and the center decorative rails. The vertical rails is another attachment point for the wire fencing which we will get to soon. With these vertical rails we just used a 2″x4″ that we used our table saw to rip 2″x2″, but you could also just purchase 2″x2″‘s.
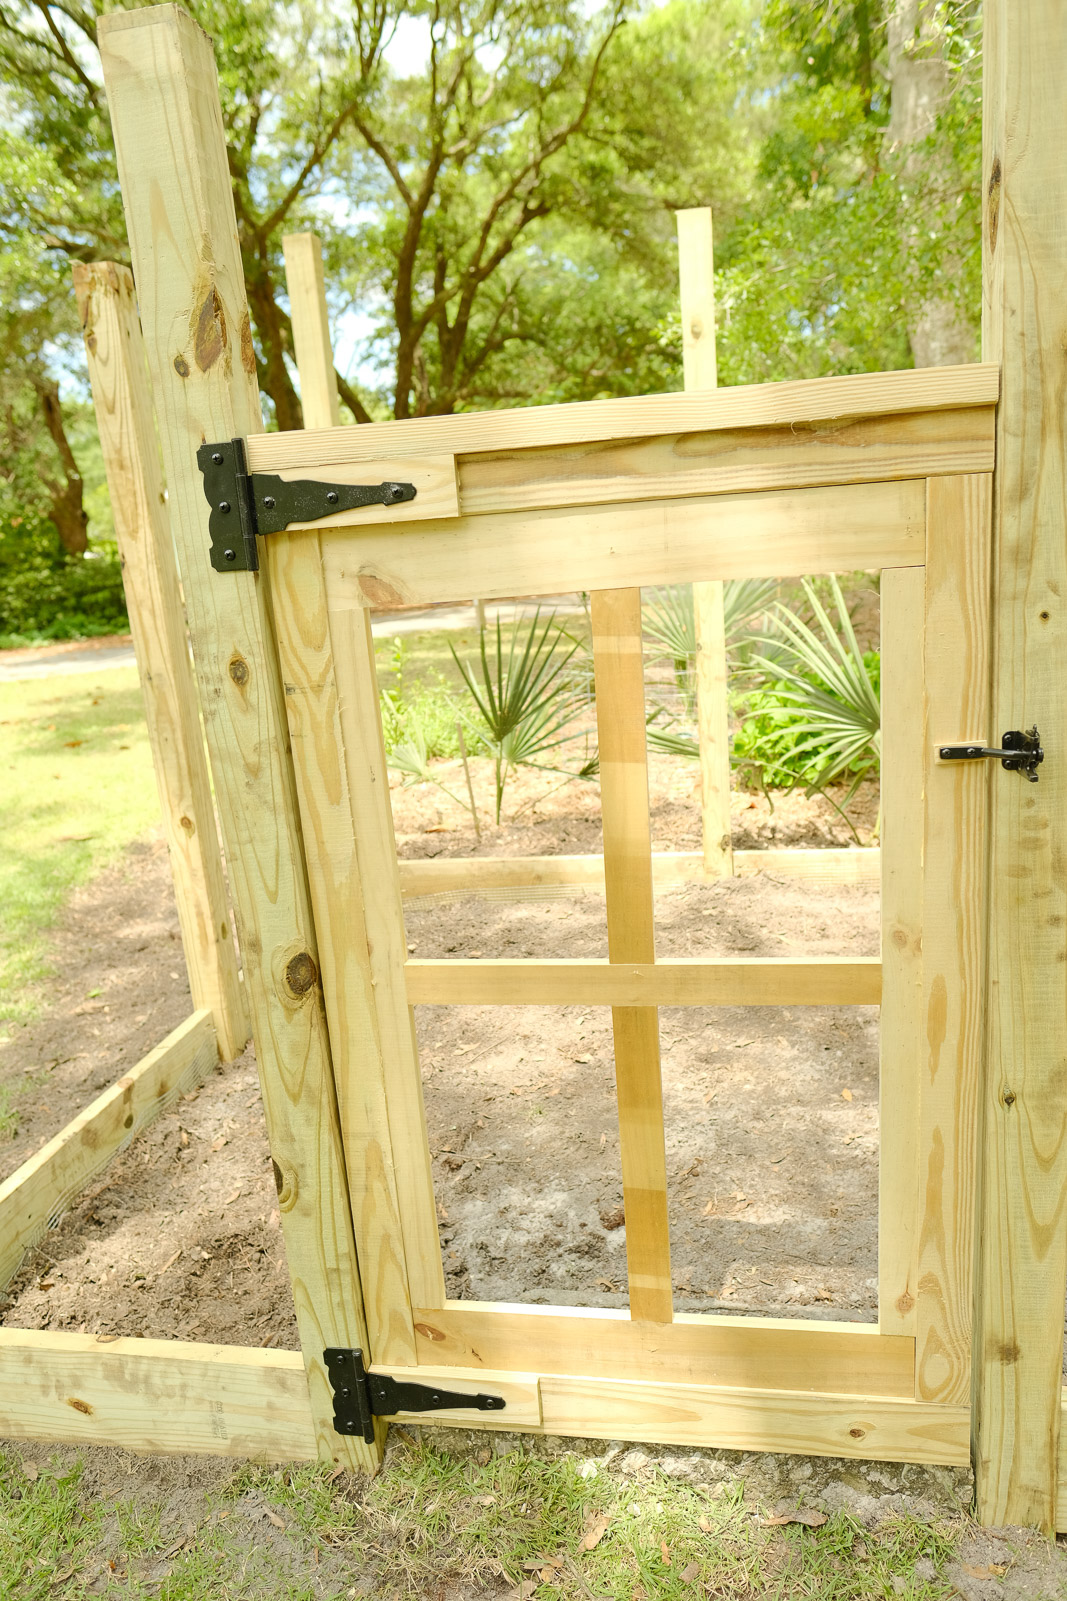
making the gate:
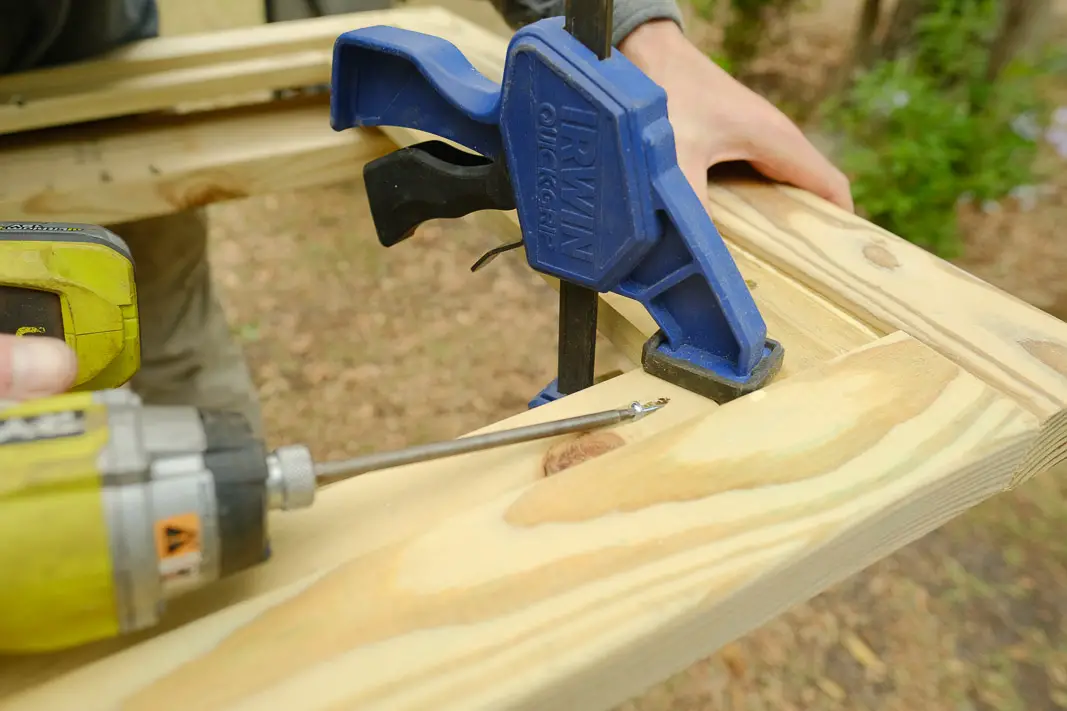
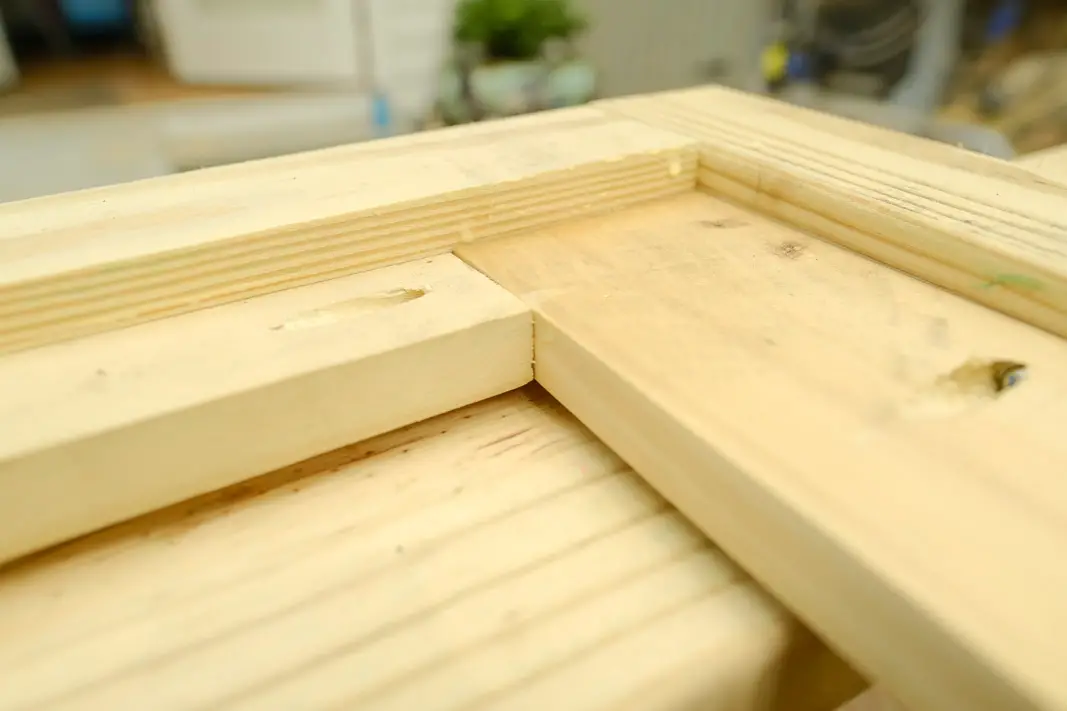
Making of the Gate could be the most difficult part of the project, however if you take your time and get it square it will work out just fine. We did the same basic idea with the gate as we did with the fence which is use 2″x4″ to create the strong outer part attaching them together with these pocket screws. Then for the decorative part we used 1″x2″ treated boards to create what you see in the middle.

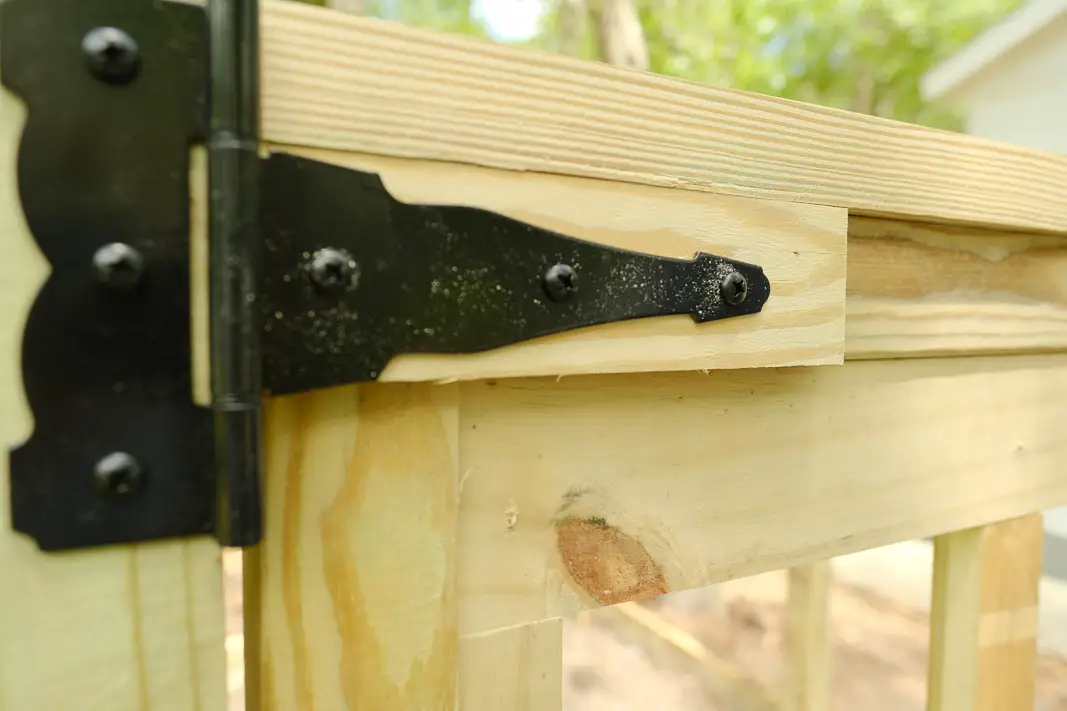
Attaching the gate:
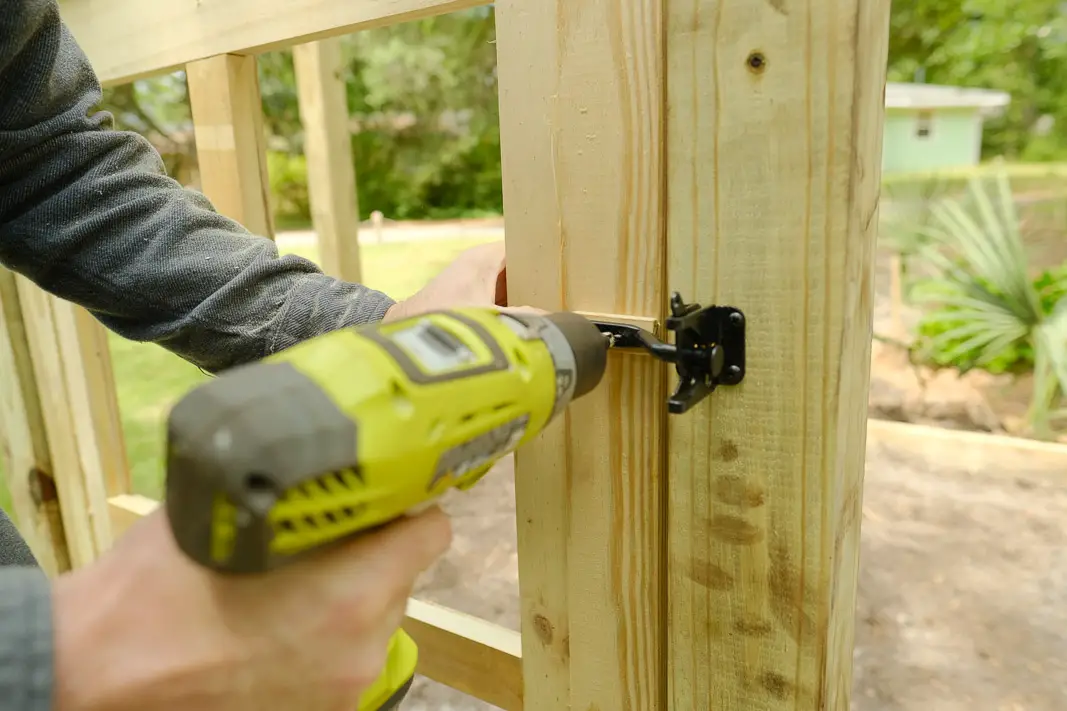
The next step is attaching the gate we used this hardware kit that made the process extremely easy.
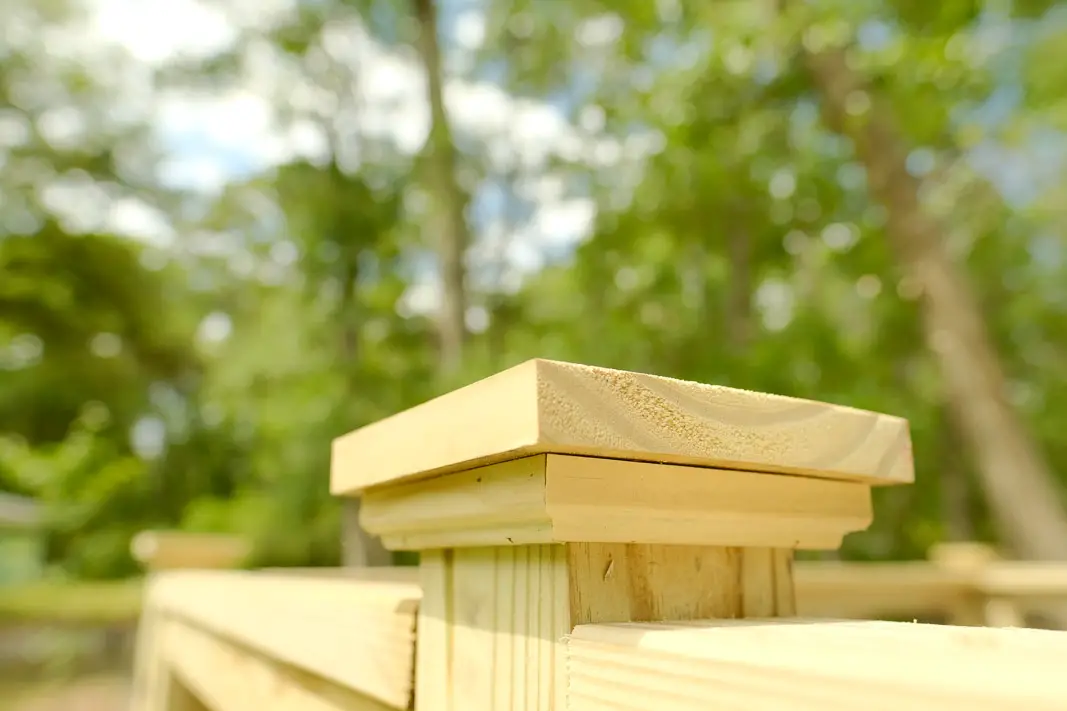
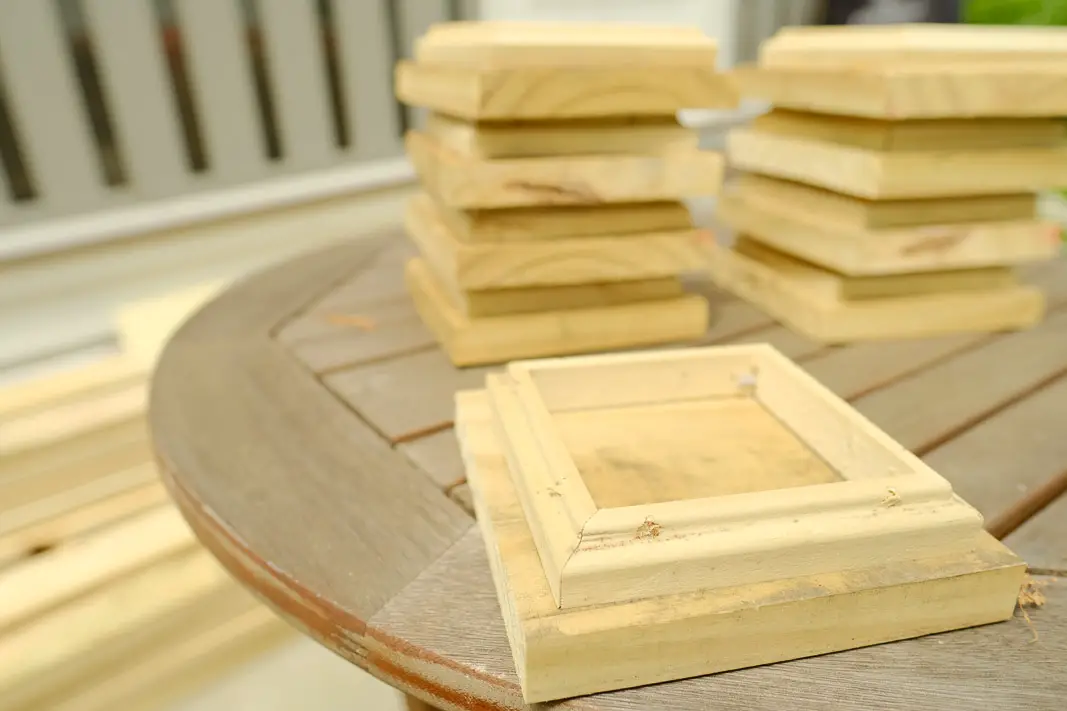
POST CAPS:
Making your own post caps is a little more challenging, but with a router and brad nailer it can be an easy way to save money. First we used a 1″x6″ treated lumber ran a router profile of our chose then ripped a 1″ strip with our table saw leaving our molding piece. The top piece we used the same lumber cutting a block 4.5″x4.5″ then mitered the trim to fit and glued and nailed in place.
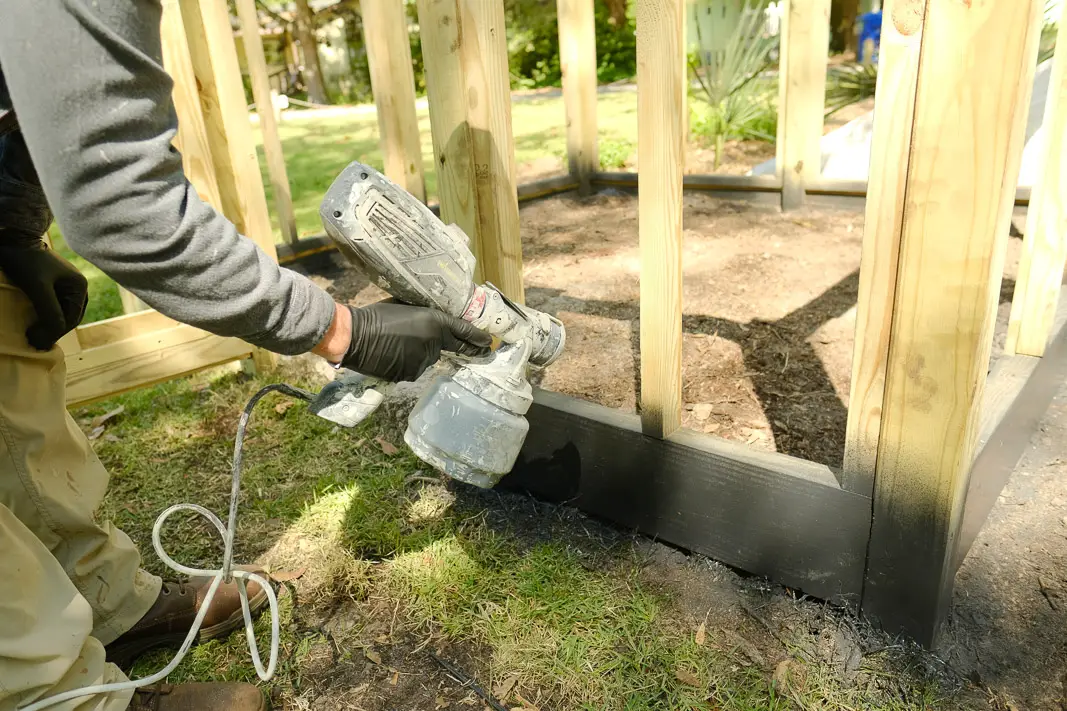
stain or paint
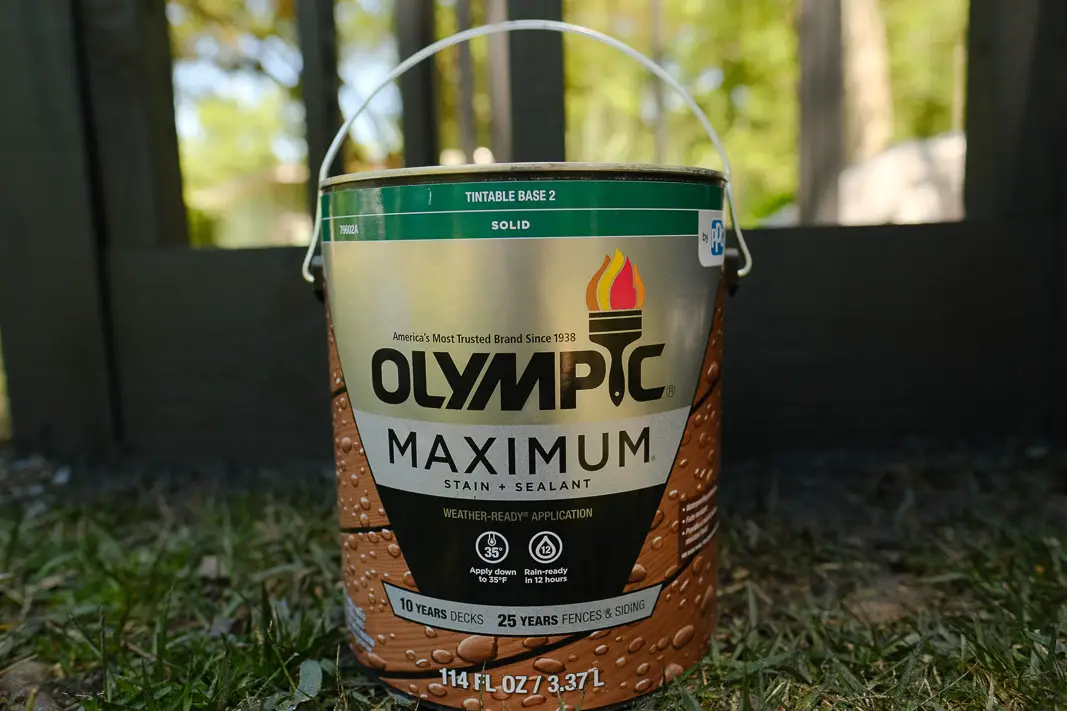
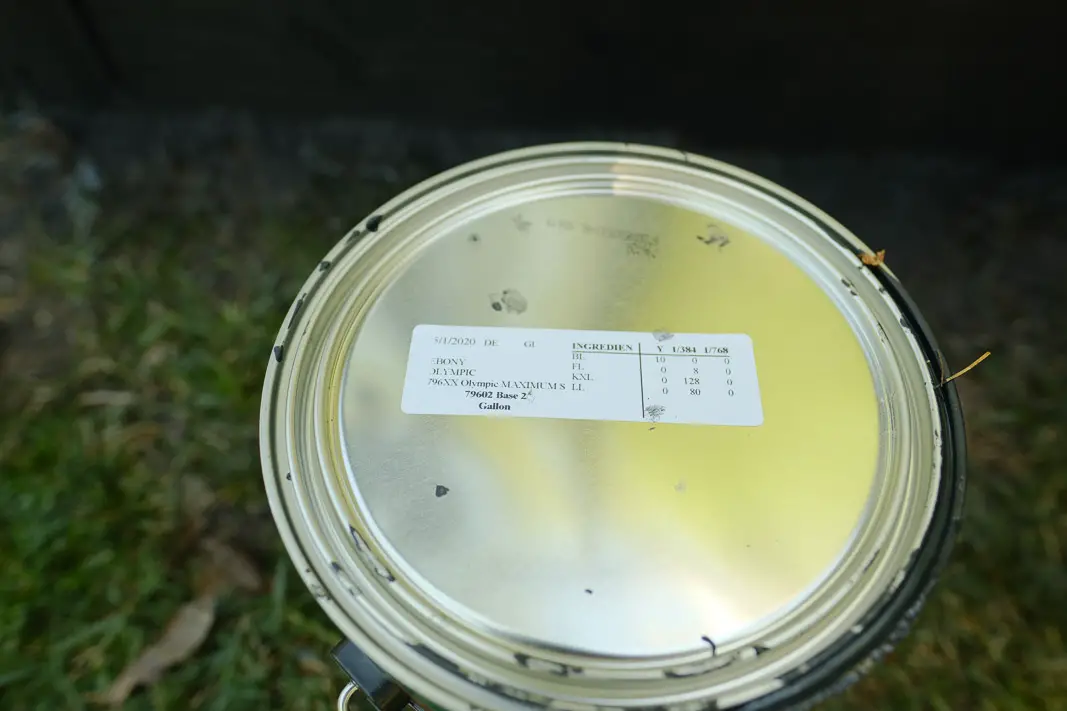
Now that everything is built its time to finish the wood we decided on a dark solid stain, but you could also do just as well with a paint pick a color you prefer and goes with your surroundings. We sped up the process with a Wagner sprayer that worked great and really got into all the little crevices that a brush would have had trouble with. Make sure to stain all pieces including the gate and the strips for attaching the fencing. We went with an Olympic Stain in the color Ebony, and it’s everything my heart desired!
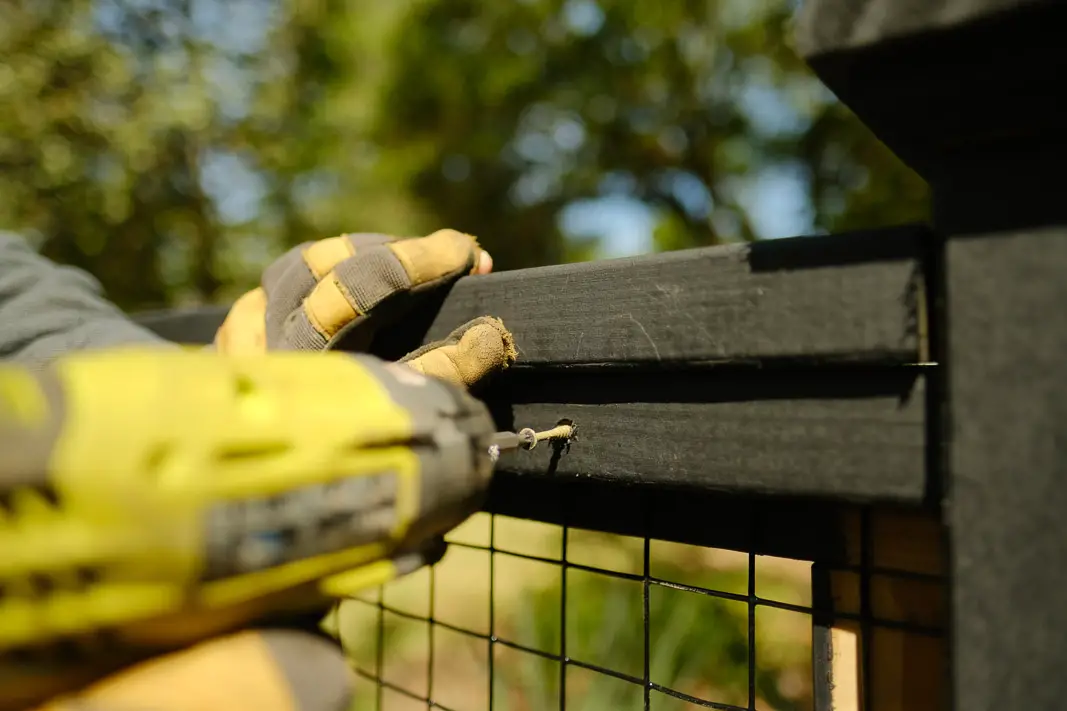
Attaching the wire fence
Attaching the wire fence could be done as simple as fence staples like these, but we decided to take it one step further. We took our leftover 2″x4″ ripped strips from them on our table saw to 5/8″ we then proceeded to use these to screw to the back side of the fence which sandwiched the wire fence in making it very secure and pleasing from the inside.
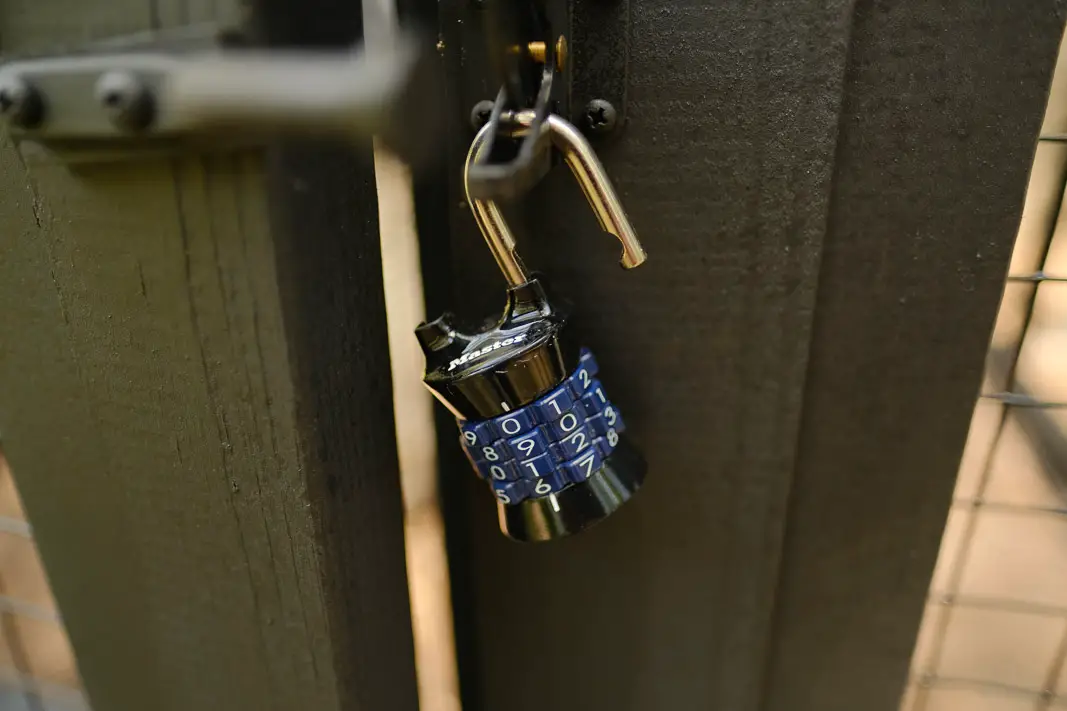
DON’T FORGET THE LOCK!
Just for peace of mind, we like locking our gardens. This Lock works perfect for easy in and easy out.
Here she is, the final Custom Vegetable Garden Fence; black cottage design
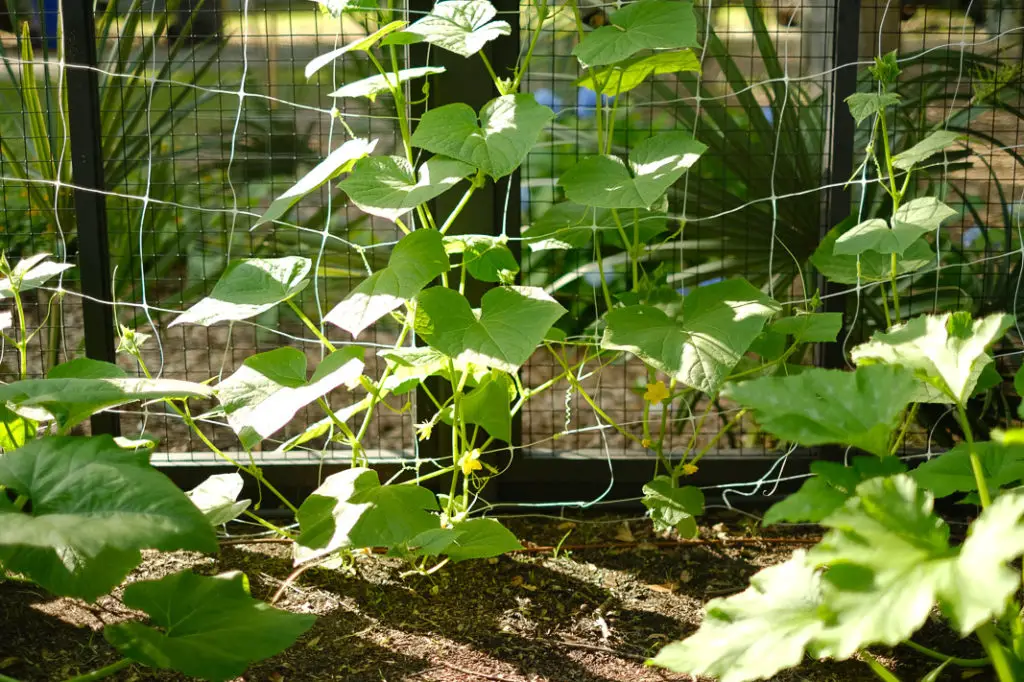
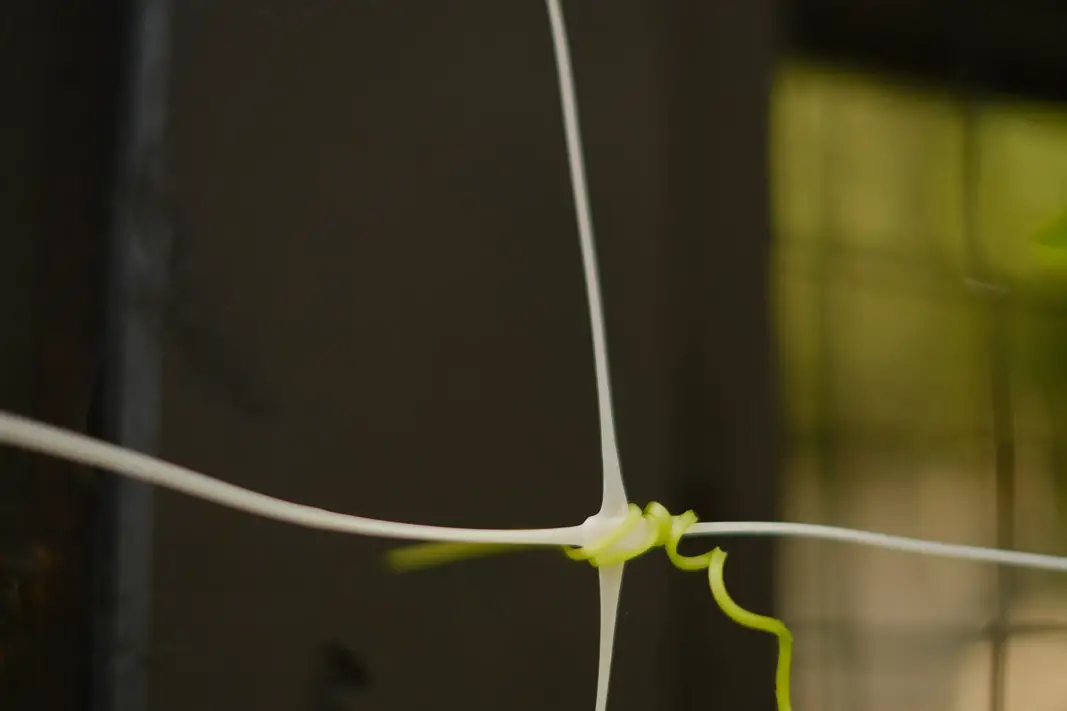
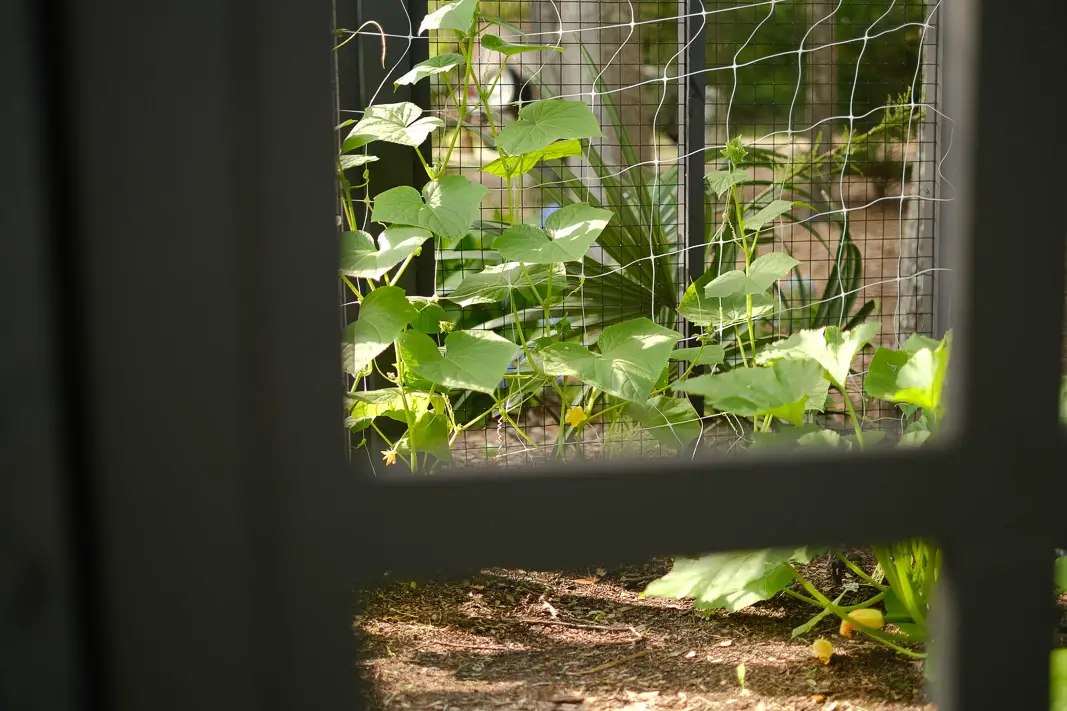
EASY TRELLIS:
There are many ways to create a trellis for cucumbers to climb, we have found we simply adore This TRELLIS NETTING! It’s lightweight, can easily be ordered online which is a HUGE plus right now when many are trying to avoid in-store purchases. It’s also very easy at the end of the season to just roll up and tuck away in your garden shed, verses having a cumbersome metal or wooden trellis. Some may also find it easier to just throw away and repurchase year after year. We try our best to recycle though.
As you can see the cucumbers absolutely love this trellis!
TO LEARN HOW WE SET UP OUR EASY drip IRRIGATION ENJOY THIS BLOG:
—->DIY VEGETABLE GARDEN IRRIGATION; MADE EASY
LET US KNOW IF YOU HAVE ANY QUESTIONS, OR COMMENTS!WE WOULD LOVE TO SEE YOUR FINISHED COTTAGE GARDEN! DID YOU MAKE ANY CHANGES?
LEAVE US A COMMENT BELOW. We hope you enjoyed our free included plans and hope our links within the blog made it a simple easy peasy one two three step process in building your own dream garden.
We hope you enjoyed our DIY Custom Vegetable Garden Fence with a black cottage design!
Thank you for enjoying my Blog!
I sure do appreciate it and would love to hear from you in the comments!
Peace, Love, and Simple Living Friends!
~Erin
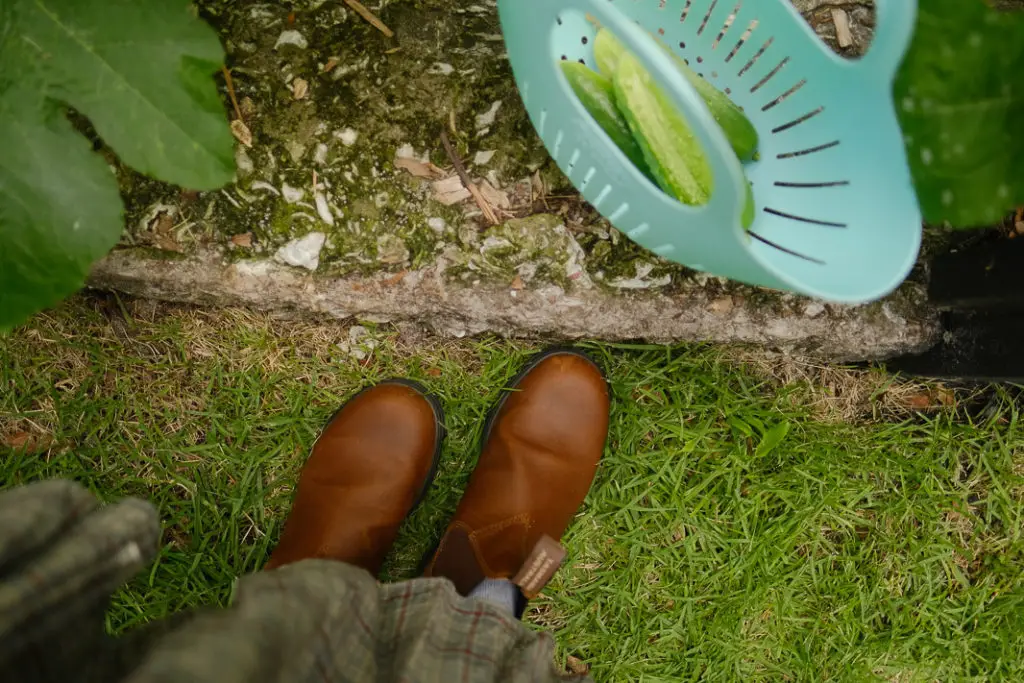
Absolutely would be THESE Boots and THIS Garden Basket!


Great work black cottage design loves it.
Thank You
Love this custom vegetable garden design. This is really looking so amazing and attractive. Thank you for sharing it.
Wow this is an amazing article and i hope this is one of the useful article for all those who want to fence in their garden and this is best source of guideline for all beginners.
Thank you for shearing this article to us…
The vegetable garden fence looks good and is so on trend. Especially after this whole pandemic ordeal, I’m sure more people will be looking to grow their own vegetables for sustainability reasons or otherwise. Thanks for sharing in such great detail how to go about creating a vegetable garden, especially for the minor details we might forget like adding a lock! No one needs squirrels and rabbits to enjoy all the hard work you put into growing your vegetables.
Your design is beautiful! It is nearly identical to one I have been conjuring in my mind for several months in preparation for constructing a 32-ft X 32-ft garden this year. Can you clarify the specifics of the hardware cloth? Specifically, does the hardware/hardwire cloth lie horizontally on the ground under the mulch and project in toward the garden from the pressure-treated boarder wood? Or, does it lie on the ground projecting outside the border wood of garden structure)? Or, is the cloth installed vertically down into the soil in alignment with the walls of the garden structure. If the latter, how deep does it go down to prevent burrowing animals from getting in?
Hi Lee,
I’m so happy to hear you love our garden design!
To answer your questions, the hardware/hardwire cloth projects “outward” this prevents it from interfering with your garden and additionally prevents critters from pushing inwards on the wire. I hope that helps!
~Erin